Side Project and the new Tig welder

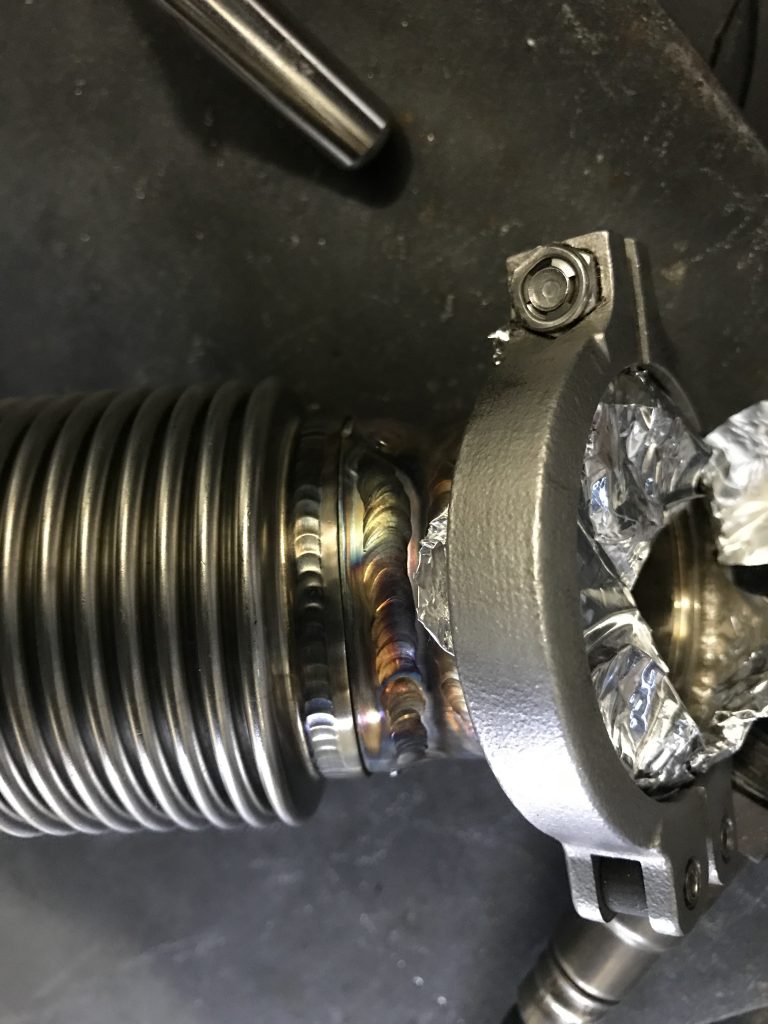
Stefanie was nice enough to buy me the tig welder I had been drooling over. I had a Lincoln Precision Tig 180 amp transformer machine before and I knew there were a few things I wanted to do differently. I was looking for an AC/DC machine but one that was inverter based and had a smaller footprint. The answer- The Primeweld 225. The support you read about online is second to none and under $900 was not bad either. The unit is always backordered but they seem to get units shipped fairly quickly,

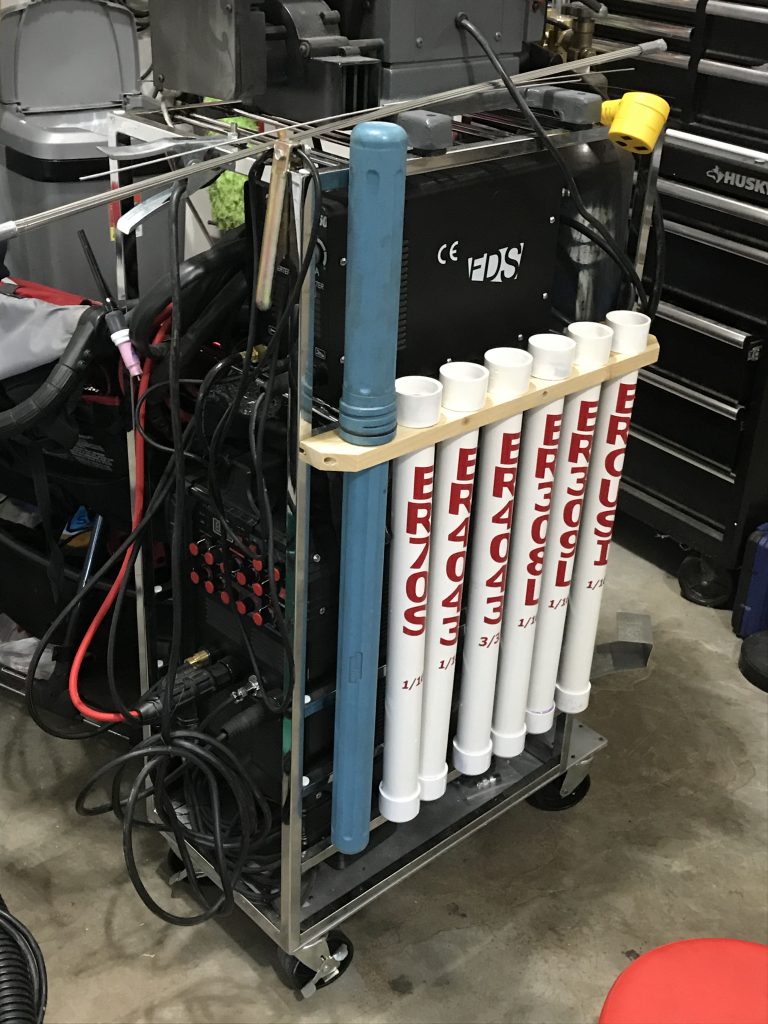
It sat on an inverted bucket until my wife fixed my next problem. I had been searching for a cart and never found any I liked. I wanted it to sit on the side of the garage and not take up a big amount of space. So what happened? While moving a piece of furniture inside a marble shelf broke and the wine rack became less useful. I offered to take it and added wheels to it.

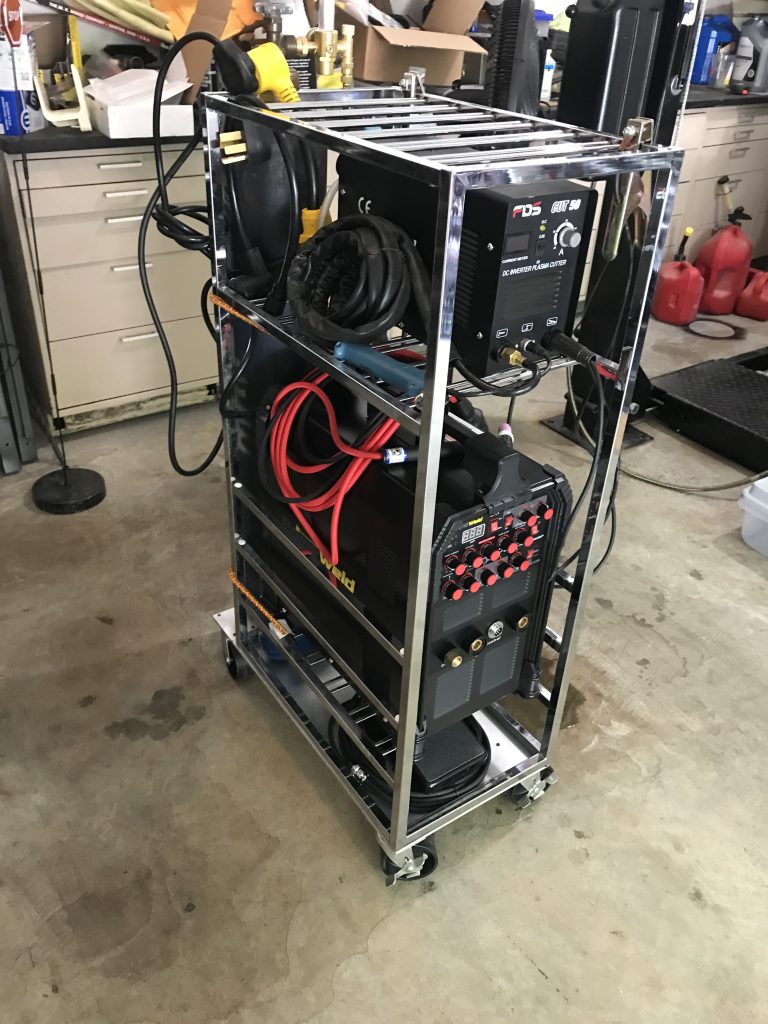
It allowed me to have my plasma cutter on it as well and space to store things. Ultimately it was a great move. I am a big fan of both the cart and the welder. The next project was storing the 5 or 6 different tig rods I had collected. I had some fancy commercial tubes but needed more and was not willing to spend $30 a piece. Following an online video I found the PVC Idea.

Essentially it is a PVC tube cut into a 2 ft and a 1 ft piece. Caps on both end and a coupler in the middle- but only glued on one side. To get maximum style points I used my plotter and cut names for each tube. So far this has been fantastic! I am a fan!

Not pictured are the top lids. This allows for easy selection and identification. The blue commercial tool needed a home and I didnt have enough PVC so it can stay for a while..

Intercooling!

Originally I thought the intercooler would be a quick and cheap project I could simply throw money at.. I was wrong. The sizes I could find were either too small or too large. The issue of exits being incorrectly placed was not a major issue.. So what was?

I wanted the intercooler to be placed in front of the radiator but also not block any more surface area with end tanks than needed. The solution? I turned to CAD- Cardboard aided design! I used the dimensions of a Garrett intercooler core and worked out how big I could make the end tanks to fit.

The CAD model was perfect and I was able to remove the pieces and lay them out in some 1.8″ 5052 Alumunium. After some cutting and tacking we had a pretty great looking intercooler! I fired up the Primeweld 225 and went to town. Things were going very well!

Until the pressure test… After several attempts to find the leak I kept on chasing an area between the core and the end tank. I would grind it down and reweld it a few times. Eventually I got frustrated and took it to a radiator repair place and they verified what I couldn’t believe- the core was leaking but in an area that would require the end tanks cut off and welded. After talking to the company I bought the core from they told me that Garrett was not being helpful and “they were truly sorry.” I won’t buy anything from Garrett again and had to cut off the tank, fix the core and then weld it again. Visually it doesn’t look as good as it did originally and I am going to hold a grudge on this one!

The end result should work well. The end tanks do not block the radiator and it appears to work well. One more project in the books!

Turbo Time!

From the beginning I knew I wanted to turbocharge the 7. I started looking online and bought all the pieces from Ace Race Parts and started cutting, chopping and grinding to get a manifold together. Initially I had the manifold pictured but landed up replacing it with one that accepted round tubes directly.

Above shows where we started but the finished manifold is seen below.

I got some great tips from my friend Jim and should have used a bigger cup. Lesson for next time! I did backpurge the manifold and the inside loops perfect! You can see the wastegate flange off the side. It isn’t optimal but they are oversized to do what they can about the gases.

Pictured is the GT3076 Garrett turbo charger. It wouldn’t fit inside the body work very well so I opted to put it outside the bodywork.

The Precision 46mm gate was picked to keep tabs on the gases. I considered the ebay generics which are substantially cheaper but opted to “buy once and cry once”after the intake manifold situation.

Thanks to Jim I got my welds to look much better. Flexible bellows were installed on the downpipe and the wastegate tube that merged back into it.

Above is the finished exhaust. The muffler tip was cut back further but all in all it sounds great and looks great in person. Up next the intake piping and intercooler work

K20 Power now bolted in!

It took a while but I snuck a half day into working on the car with my dad. While I thought it was 3 hours of work it actually took 6.

First thing was to pull the k20a3 and remove the transmission and adapter plate.

Up next was moving those parts to the K20z3 and bolting them all back together.

From there we worked out what needed to be changed and we we removed and replaced a tube in the chassis. We also removed the old motor mounting plate and cut a new piece. After 5-10 minutes of welding we started to position the engine.

After measuring and cutting several tubes we had the left side mounted. Next we leveled the engine to 0.6 degrees and started on the driver side. They came out quite well

The final step was to check hood clearance. I didn’t expect it to fit but was nicely surprised. 3 mm to spare!

There week be some challenges with the steering and alternator but those are for a different day!

Ground clearance is a nice and acceptable 4″

Up next is the transmission mounts!

The disassembly begins….

After many months of collecting parts I believe I am finally in a position to start pulling the car apart in preparation for the engine swap.  For those who haven’t seen or heard- I will be removing the Miata Engine and replacing it with a 2.0 GM Ecotec engine (with Turbocharger and direct injection..)


Here is a short video on the overview : https://www.youtube.com/watch?v=IajZ-zl0AzY


I will admit- I had a large amount of anxiety (and still do..) about pulling apart a car that was driving and running quite well. Especially not knowing if this new engine would fit or how many modifications are needed.

Starting with the seats, then the transmission tunnel, Radiator, scuttle and some sheet metal I started to pull off the covers and find things to remove- There certainly is no shortage.

The radiator was long overdue for a flushing, the seats had crap under them from 2010 and the questions continue. I also made the decision to remove the installed Halon Fire system and replace it with a single hand held unit in future. There are a few pounds I feel we can save!

Looking at all the wiring and I certainly think there is a good 40 or 50lbs of wiring that will be coming out of the already trimmed down harness

Mitch from Swap Time recently did a video about the harness. It is set to arrive on Wednesday of this week. Following that I will probably try find an hour or 2 to pull the engine this weekend and see if the new one fits!

Here was a video of the harness he made- https://www.youtube.com/watch?v=1jGzw7sIMFI

I suspect I will need to wire in headlights, tail lights and turn signals as well. The goal there is to keep them all as minimal as possible

Subscribe if you wish to follow along. The YouTube video channel as well as this webpage should both see a few updates in the coming weeks!

Finishing up the front of the engine

To finish the front of the motor I needed to find a way to tension the belt due to the fact I wont have an AC compressor.

To start I went to NAPA to get an Idler and a belt. I wanted to mount the tensioner high up since my engine often sits below the frame rail.

Pulley came from NAPA. It is grooved and part number 409703

This wasn’t the first belt I bought. I think the factory part was 1940mm. I went to 1740mm to get a good fit.

Napa Part number 050685- It is a 5 Rib 1740mm belt.

This shows the belt route and the rough placement I was considering. Note my tensioner is smaller than the factory AC Pulley.

Bracket created using the 2 front bolt holes. It is a solid fit so I didnt feel like I needed to move further back and triangulate.  Note the location is higher than an AC.

This is the side view. It was essentially 2 pieces at right angles with a brace to stop deflection.

This is a close up view of the bracket. I painted it while hot so the paint bubbled. I like the look.

The end result is fairly good. I am happy and things appear to be tracking well and cleanly. I might add a nut to the back of the bolt. Right now I have tapped the steel plate (3/8″ thick) so I think it is good enough.

Clutch Parts needed to make a braided Line

If you own a Camaro or ATS chances are you have the same transmission I am using.  The one piece I will be using is the stock throw out bearing.  Unfortunately The clutch hose I received was cut and my car actually has a steel braided AN line today. I plan to simply unscrew the -4 fitting that attaches to the miata slave cylinder and thread this piece on. That should be all that is needed to operate the hydraulic clutch for the LTG.

Part Number 139160 from Summit Racing

Flywheel pilot bearing hell!

My personal opinion is that Fidanza shouldn’t be allowed to sell parts with sick half assed support . To get a party they recommended I would have to go to Europe or China but online the part is harder to find than a uniform.

I bought a piece of bronze on what and stayed to machine my own. The dimensions were simple. 16mmID 28mmOD and 26mm in length. It took about an hour to make.

Overall it will get the job done and be fine. That said I am no where near the phase of recommending a fidanza product. Especially after the need for custom bolts!

http://www.exportedafrican.com/wordpress/wp-content/uploads/2018/06/img_8470.mov

Turbocharger Arrived

Turbocharger Arrived this week and I quickly mounted it in a mock up fashion.  Finding the size nuts and bolts for it is proving it be a royal pain in the ass.

It is a used unit from a junk yard off a stock motor which should be good enough for mock ups and to get things rolling.  The air exit pipe actually fits in a good spot. Hopefully it will stay within the body lines.


Missing the factory heat shield but  can make one fairly easily.  If anyone knows the nut size or part number for the turbo please let me know. 

The turbo came with 1 oil pipe but  the other is missing and will need to be bought.

The turbo mounts further out then I would like but hopefully it will work.

Water lines need to be made/purchased. Unfortunately without using the stock radiator and coolant tank it may be another custom effort

Engine Preparation

This weekend I started cleaning the engine (Brake clean is the $hit!) with the intention of mounting the flywheel and trans in the near future.  There are some cheap engine stands on amazon for $40 but I don’t feel they would bolt up easily. I will probably start to build and frame up something that will offset the engine and make transmission attachment plausible.


For the transmission I added a bar at the back with 2 casters. That makes it easy to pick up the one side of the engine and slide it around.

Car is in the background. I do feel the intake manifold will need to be replaced with something custom to prevent the large side bulge.

I could use some help. If someone knows the connector that I could replace the clutch line with I would appreciate it.  The factory line was cut and this was the connector that is left (It goes into the clutch slave cylinder). Ideally I want this piece to a -4an fitting to connect to my Wilwood master cylinder.