TPS problems…but solution!

The car starts SMS revs perfectly but a nagging problem is I would not see any indications on the software of a TPS signal below WOT. The problem produced odd behavior but I believed it was just how the Hondata ecu worked.

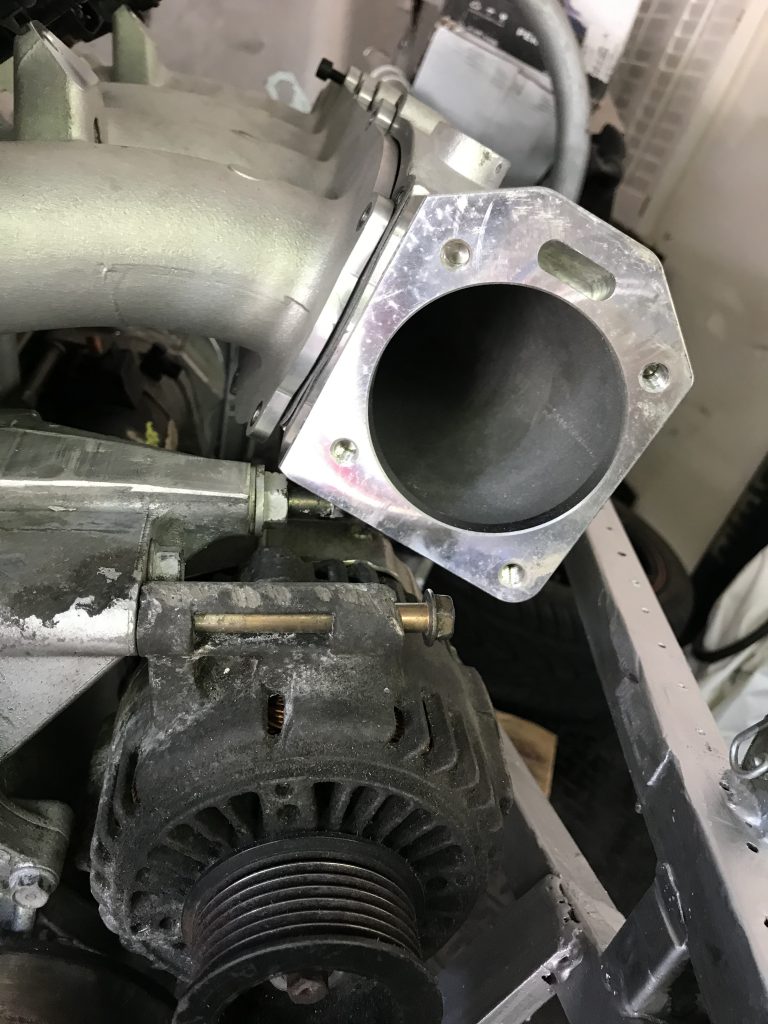
After driving and not seeing the tuning results in the data log I decided to pull the tps and flip it 180 degrees. I’m doing so I noticed the connection point was incorrect and the sensor was not making contact with the throttle shaft until 25% of the sweep happened. A small correction and things were showing TPS motion the entire way through the range. Timing is more responsive and drivability is better.

One problem remains. Under WOT I am not seeing boost over 1 psi. The watergate has a 7 psi spring in it and so something isn’t kosher. The hunt continues…

Intercooling!

Originally I thought the intercooler would be a quick and cheap project I could simply throw money at.. I was wrong. The sizes I could find were either too small or too large. The issue of exits being incorrectly placed was not a major issue.. So what was?

I wanted the intercooler to be placed in front of the radiator but also not block any more surface area with end tanks than needed. The solution? I turned to CAD- Cardboard aided design! I used the dimensions of a Garrett intercooler core and worked out how big I could make the end tanks to fit.

The CAD model was perfect and I was able to remove the pieces and lay them out in some 1.8″ 5052 Alumunium. After some cutting and tacking we had a pretty great looking intercooler! I fired up the Primeweld 225 and went to town. Things were going very well!

Until the pressure test… After several attempts to find the leak I kept on chasing an area between the core and the end tank. I would grind it down and reweld it a few times. Eventually I got frustrated and took it to a radiator repair place and they verified what I couldn’t believe- the core was leaking but in an area that would require the end tanks cut off and welded. After talking to the company I bought the core from they told me that Garrett was not being helpful and “they were truly sorry.” I won’t buy anything from Garrett again and had to cut off the tank, fix the core and then weld it again. Visually it doesn’t look as good as it did originally and I am going to hold a grudge on this one!

The end result should work well. The end tanks do not block the radiator and it appears to work well. One more project in the books!

Intake Manifold Adventures

After lots of fighting with the intake manifold I decided to stop being cheap and throw money at the problem. What was the problem you say ?

Pardon the dirty alternator..

So the Skunk 2 intake manifold was never designed to be flipped for a RWD configuration. It has the modular design but the flipping is better suited to a K24 than a K20 because of the shorter deck height by 1″.

The intake manifold was a disaster from day 1! It requires that you cut the water pump housing to make it fit and then use spacers/washers to tension the alternator. After hacking up the housing I found that I was still likely to hit the alternator. The solution? I tried to buy the spacer that makes a B series throttle body work on the K series intake. I never attempted to install it and landed up selling it and the intake and ordering the Kmiata intake manifold and throttle body. It was backordered but worth the wait. I did follow the recommended guidance and bought the misalignment spacers due to the flanges not being parallel.

The manifold had the water passage built in which was a nice change and something I didn’t need to buy another part. Generally the fitment is good, the IAC did need a new part (from ebay) but that fitted nicely. All in all it was something I should have done from the beginning.

K20 Power now bolted in!

It took a while but I snuck a half day into working on the car with my dad. While I thought it was 3 hours of work it actually took 6.

First thing was to pull the k20a3 and remove the transmission and adapter plate.

Up next was moving those parts to the K20z3 and bolting them all back together.

From there we worked out what needed to be changed and we we removed and replaced a tube in the chassis. We also removed the old motor mounting plate and cut a new piece. After 5-10 minutes of welding we started to position the engine.

After measuring and cutting several tubes we had the left side mounted. Next we leveled the engine to 0.6 degrees and started on the driver side. They came out quite well

The final step was to check hood clearance. I didn’t expect it to fit but was nicely surprised. 3 mm to spare!

There week be some challenges with the steering and alternator but those are for a different day!

Ground clearance is a nice and acceptable 4″

Up next is the transmission mounts!

New engine deal of the day!

I’ve been watching the internet for an I-vtec motor and seem to find every idiot in town. Eventually I found someone that had a K20Z3 engine with medium miles. It was a good option and should fit well. At 7 am I pulled it out of my truck and drained the oil. All in all it looks like it’s up to the task!

I don’t have an intake manifold. If anyone has one that would fit please let me know. I’m going to try a standard Honda one first before going the skunk2 route.