A short video showing the various components. It is a self adjusting pressure plate which was an interesting discovery for the first time!

Following an endless desire to know more and go faster!
A short video showing the various components. It is a self adjusting pressure plate which was an interesting discovery for the first time!
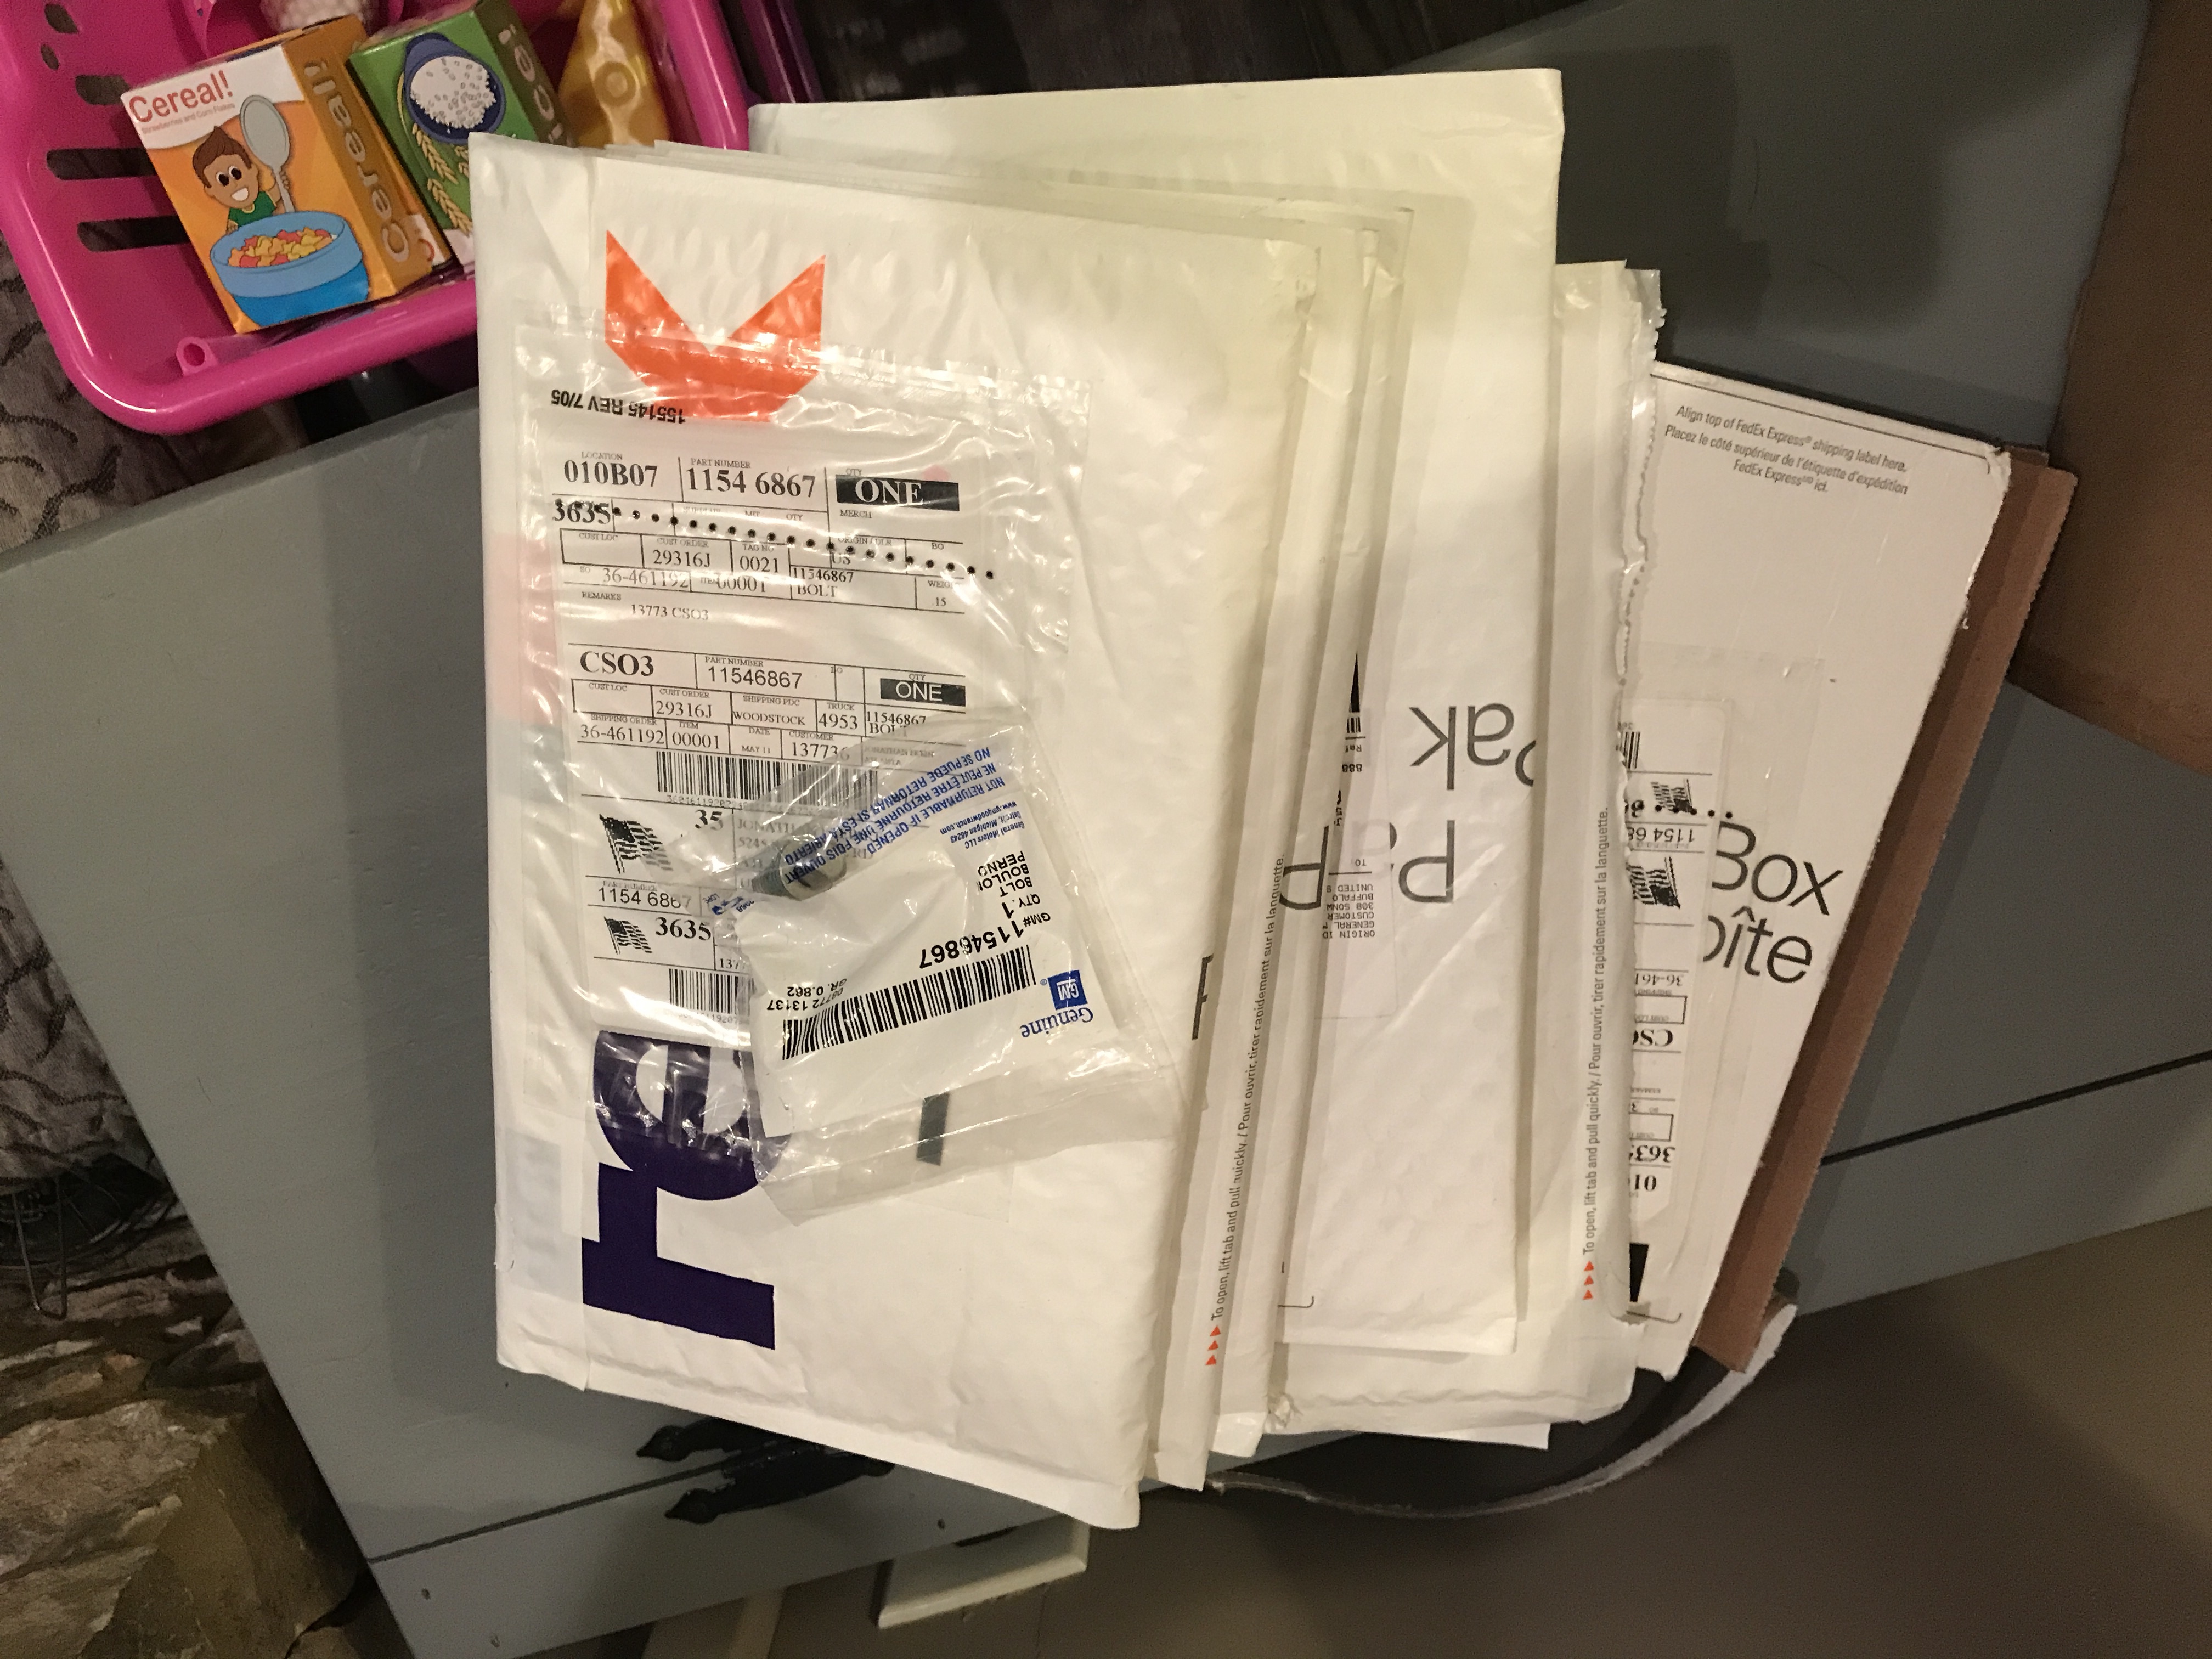
I recently bought clutch cover bolts online and ironically 6 packages came from a GM online dealer. To my disappointment each only had 1 m6 bolt within it.
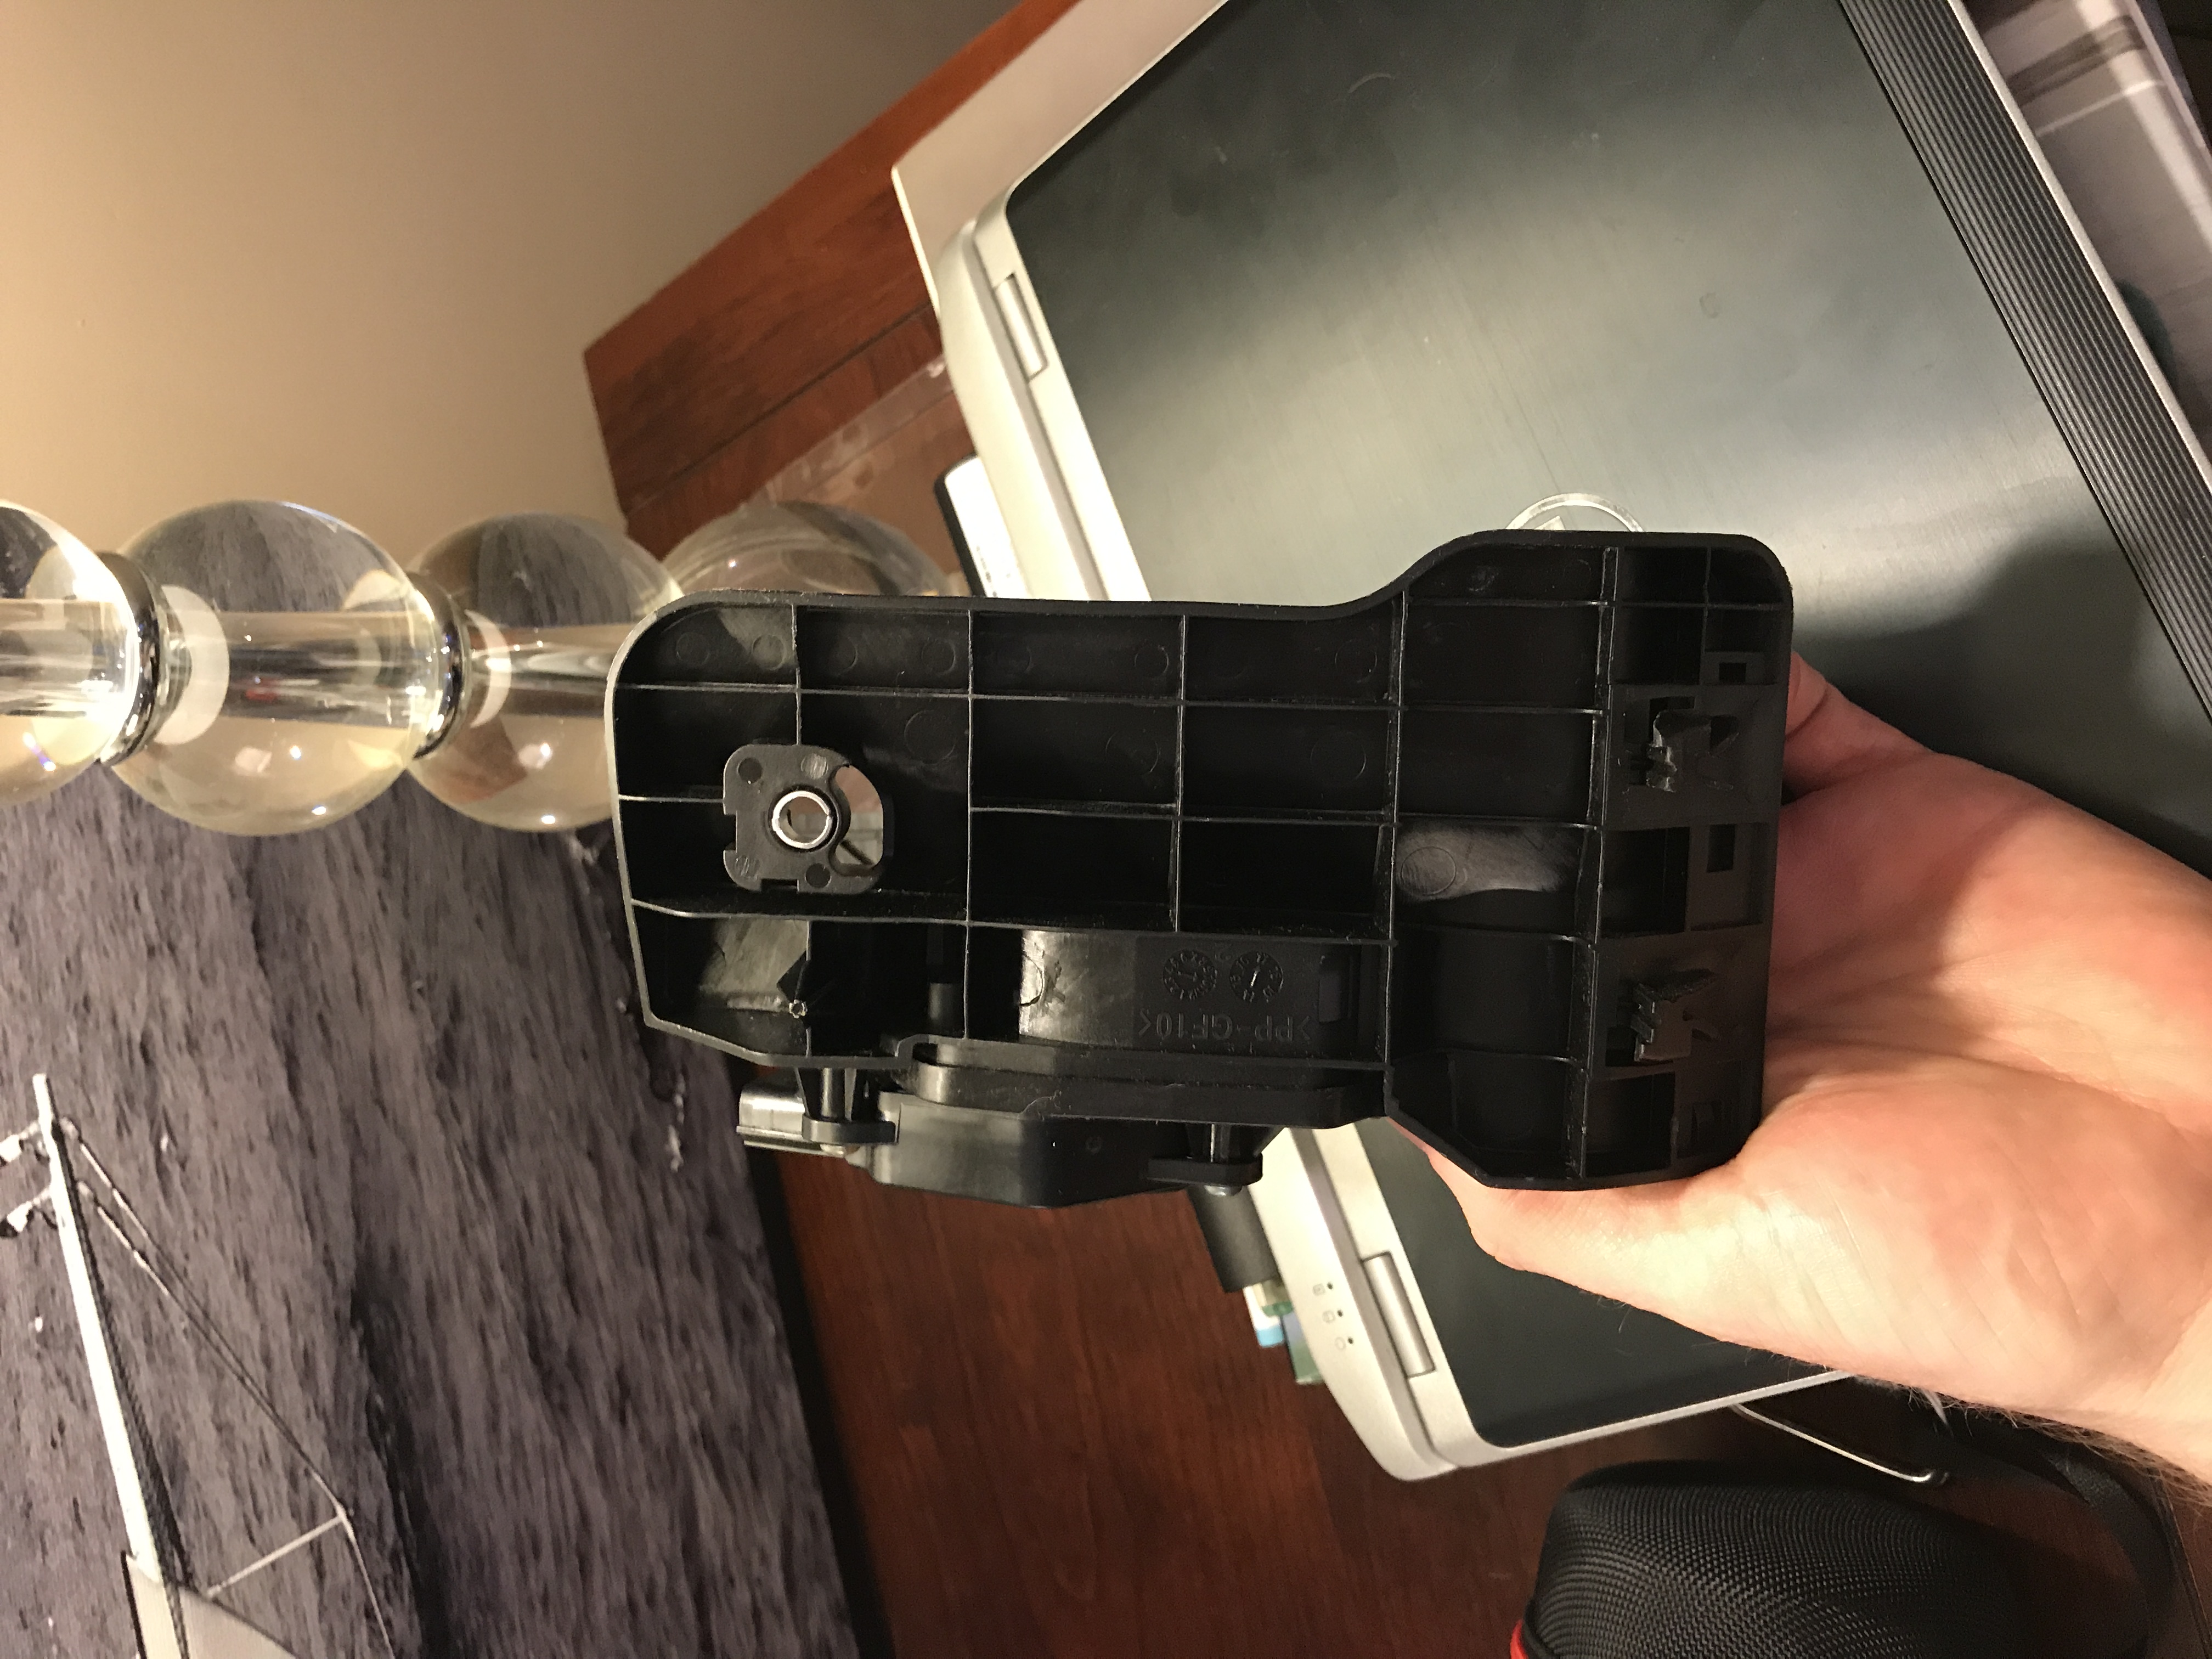
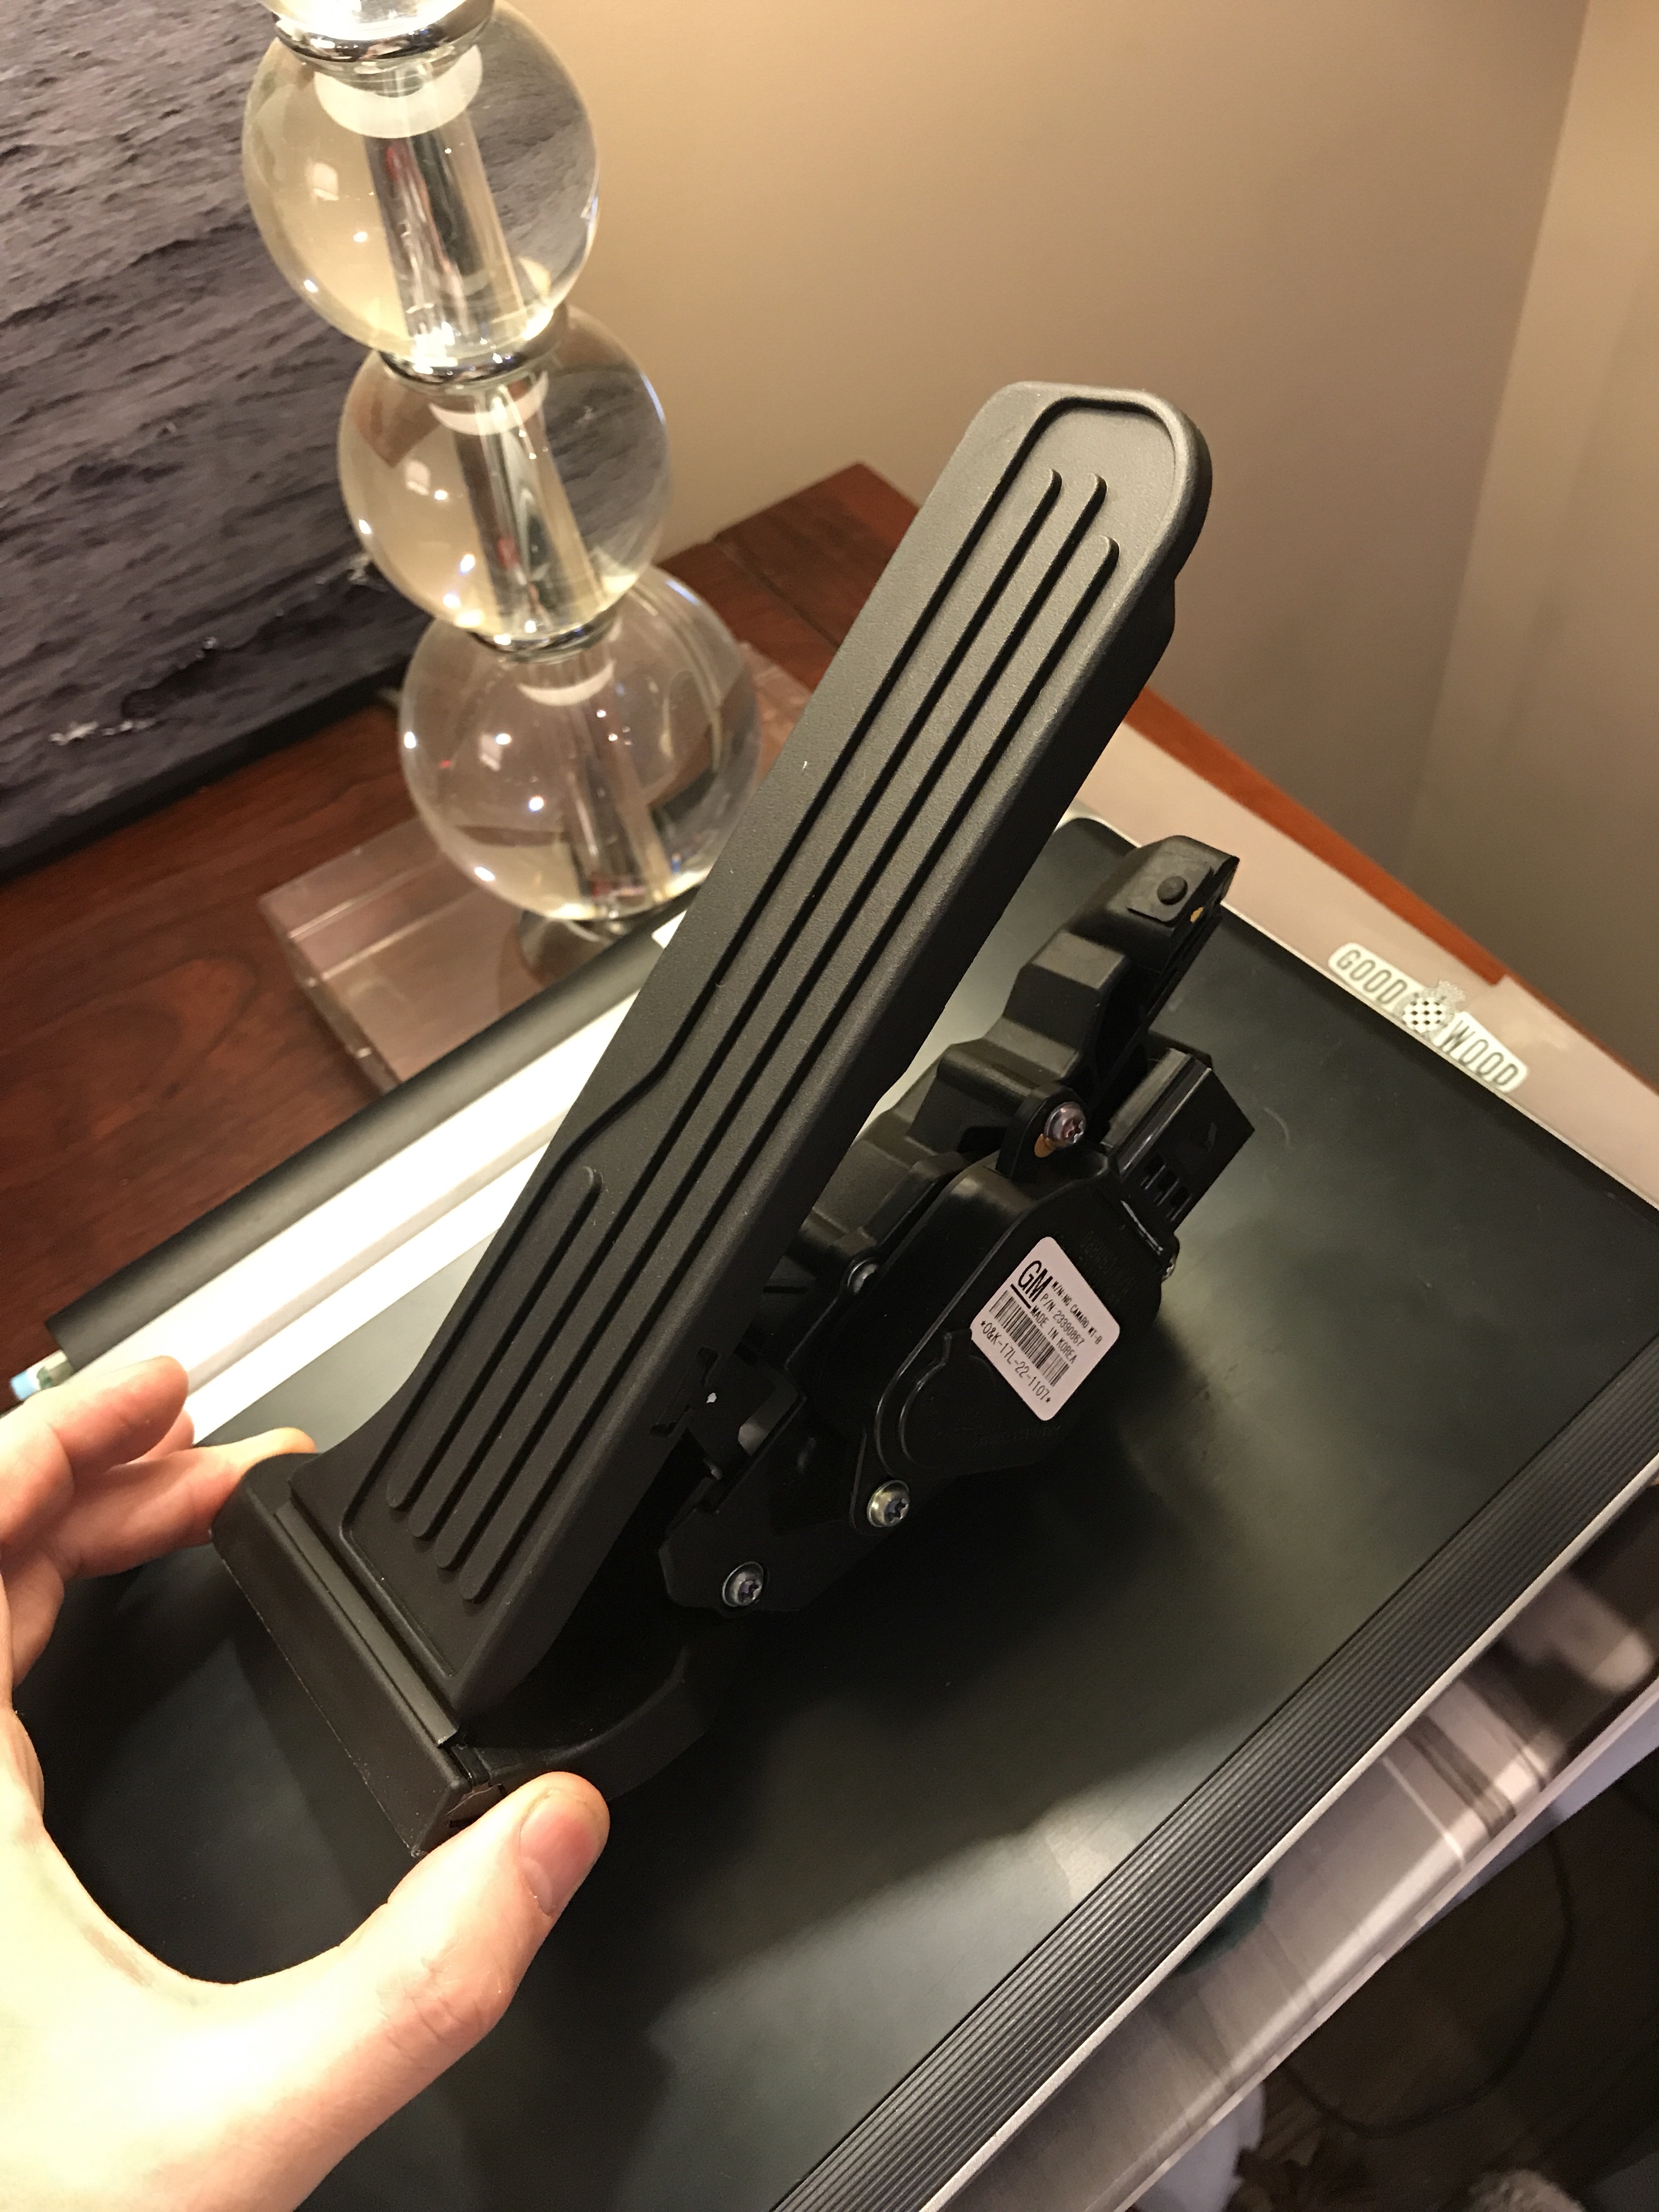
This is the GM throttle pedal. It isn’t ideal because of the angle that it mounts but some fabrication can make it work. Because the ecu is drive by wire a new pedal was needed. Here are a few pictures showing the pedal

To get the motor off of the pallet I wanted to build a “skate” to hold the engine and trans. My goal is to add wheels to the engine and the trans and have an assembly that can move around and probably running.
This is the passenger side of the engine that a mount needs to connect towards
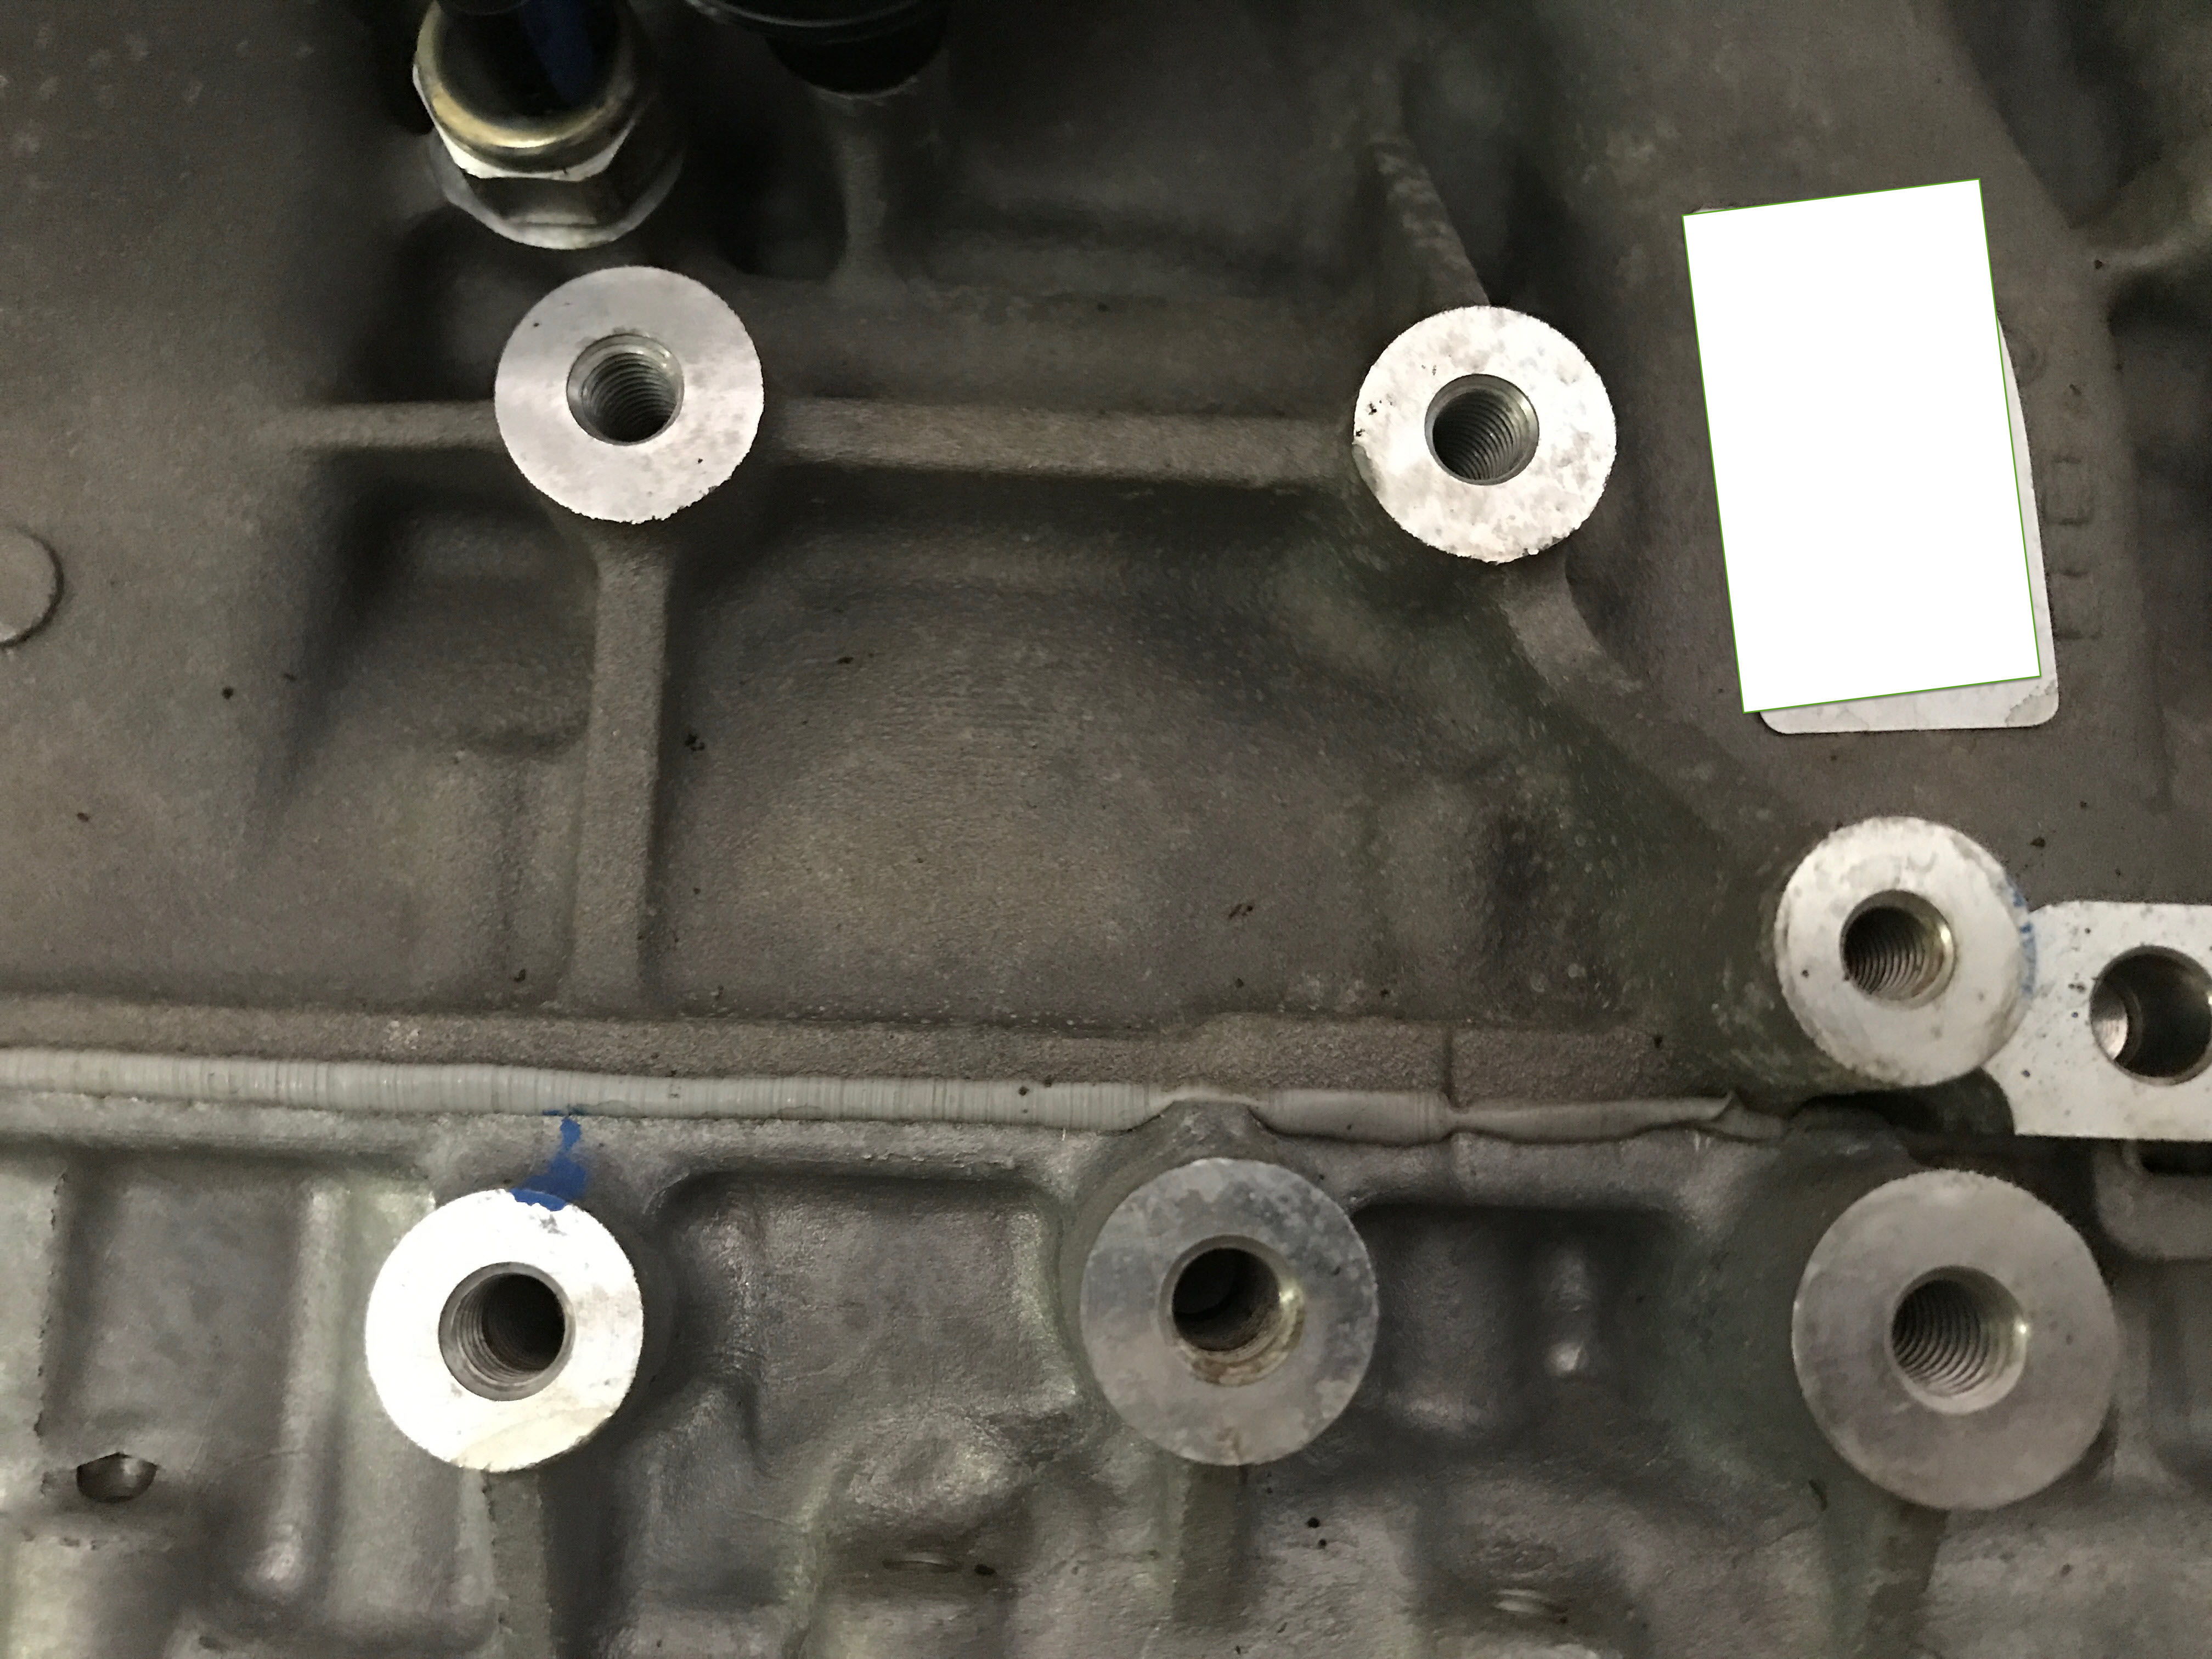
This is the drivers side of the engine. 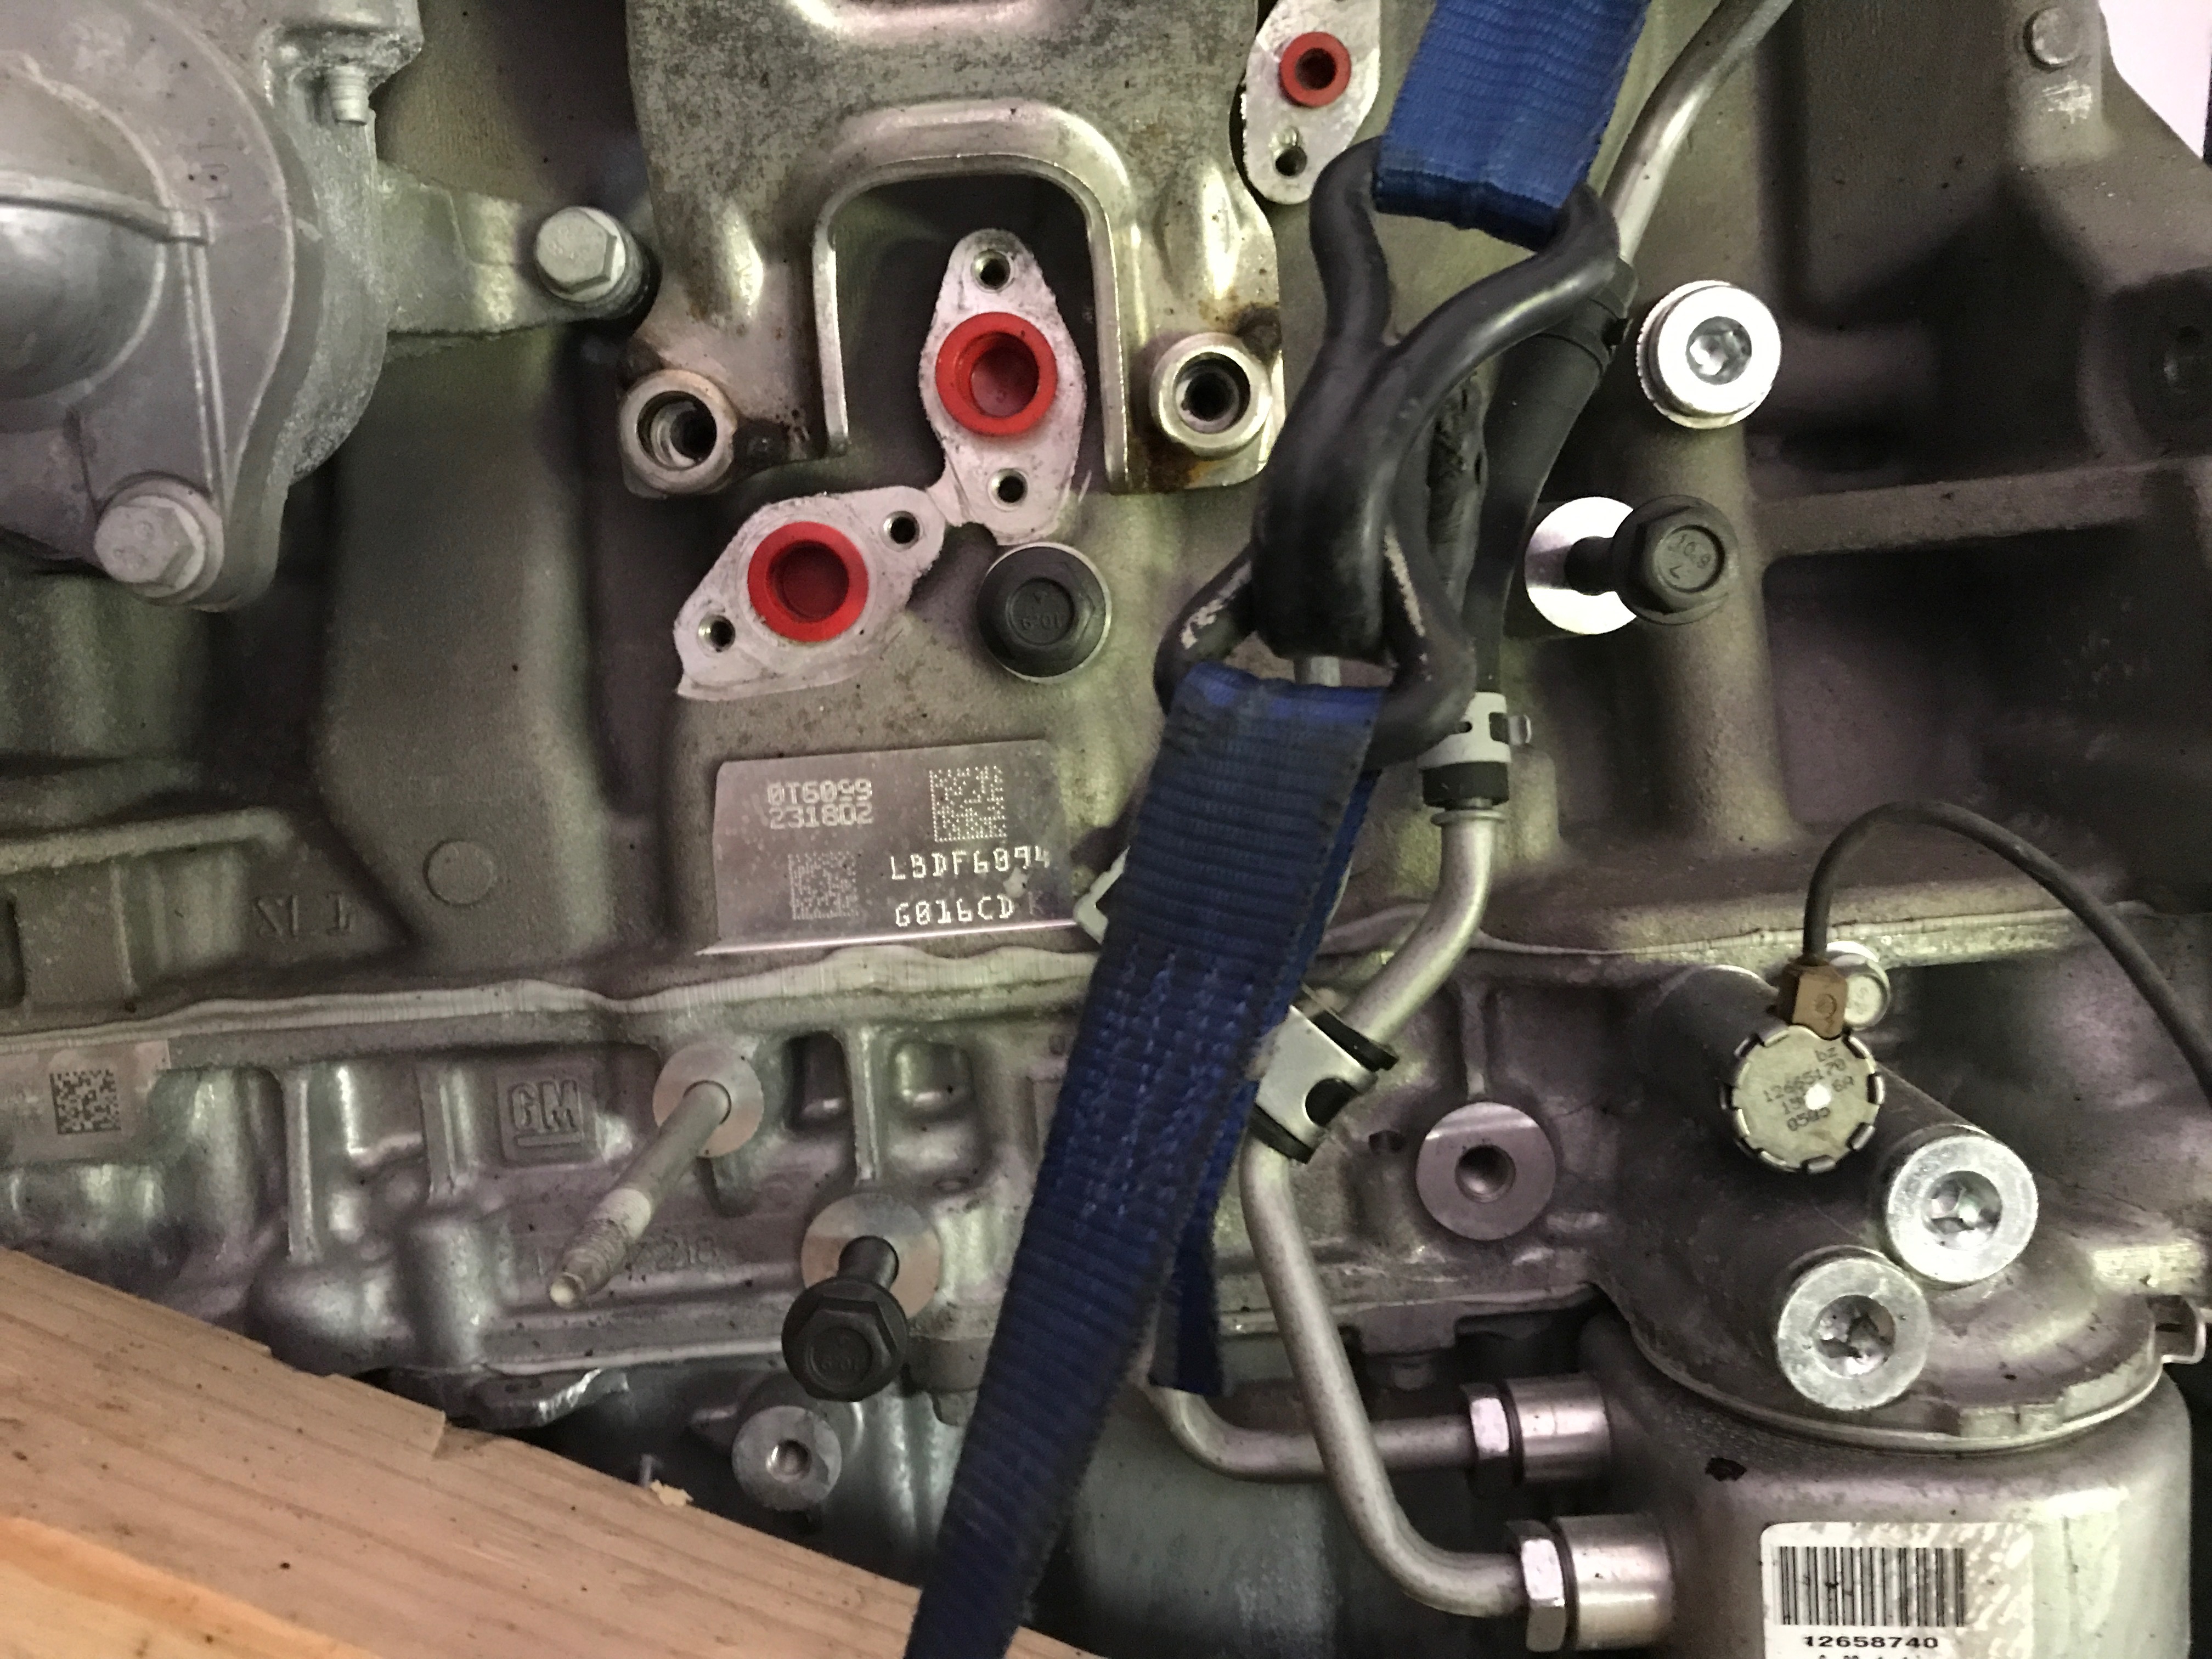 This is what I suspect the mounting plates will look like.
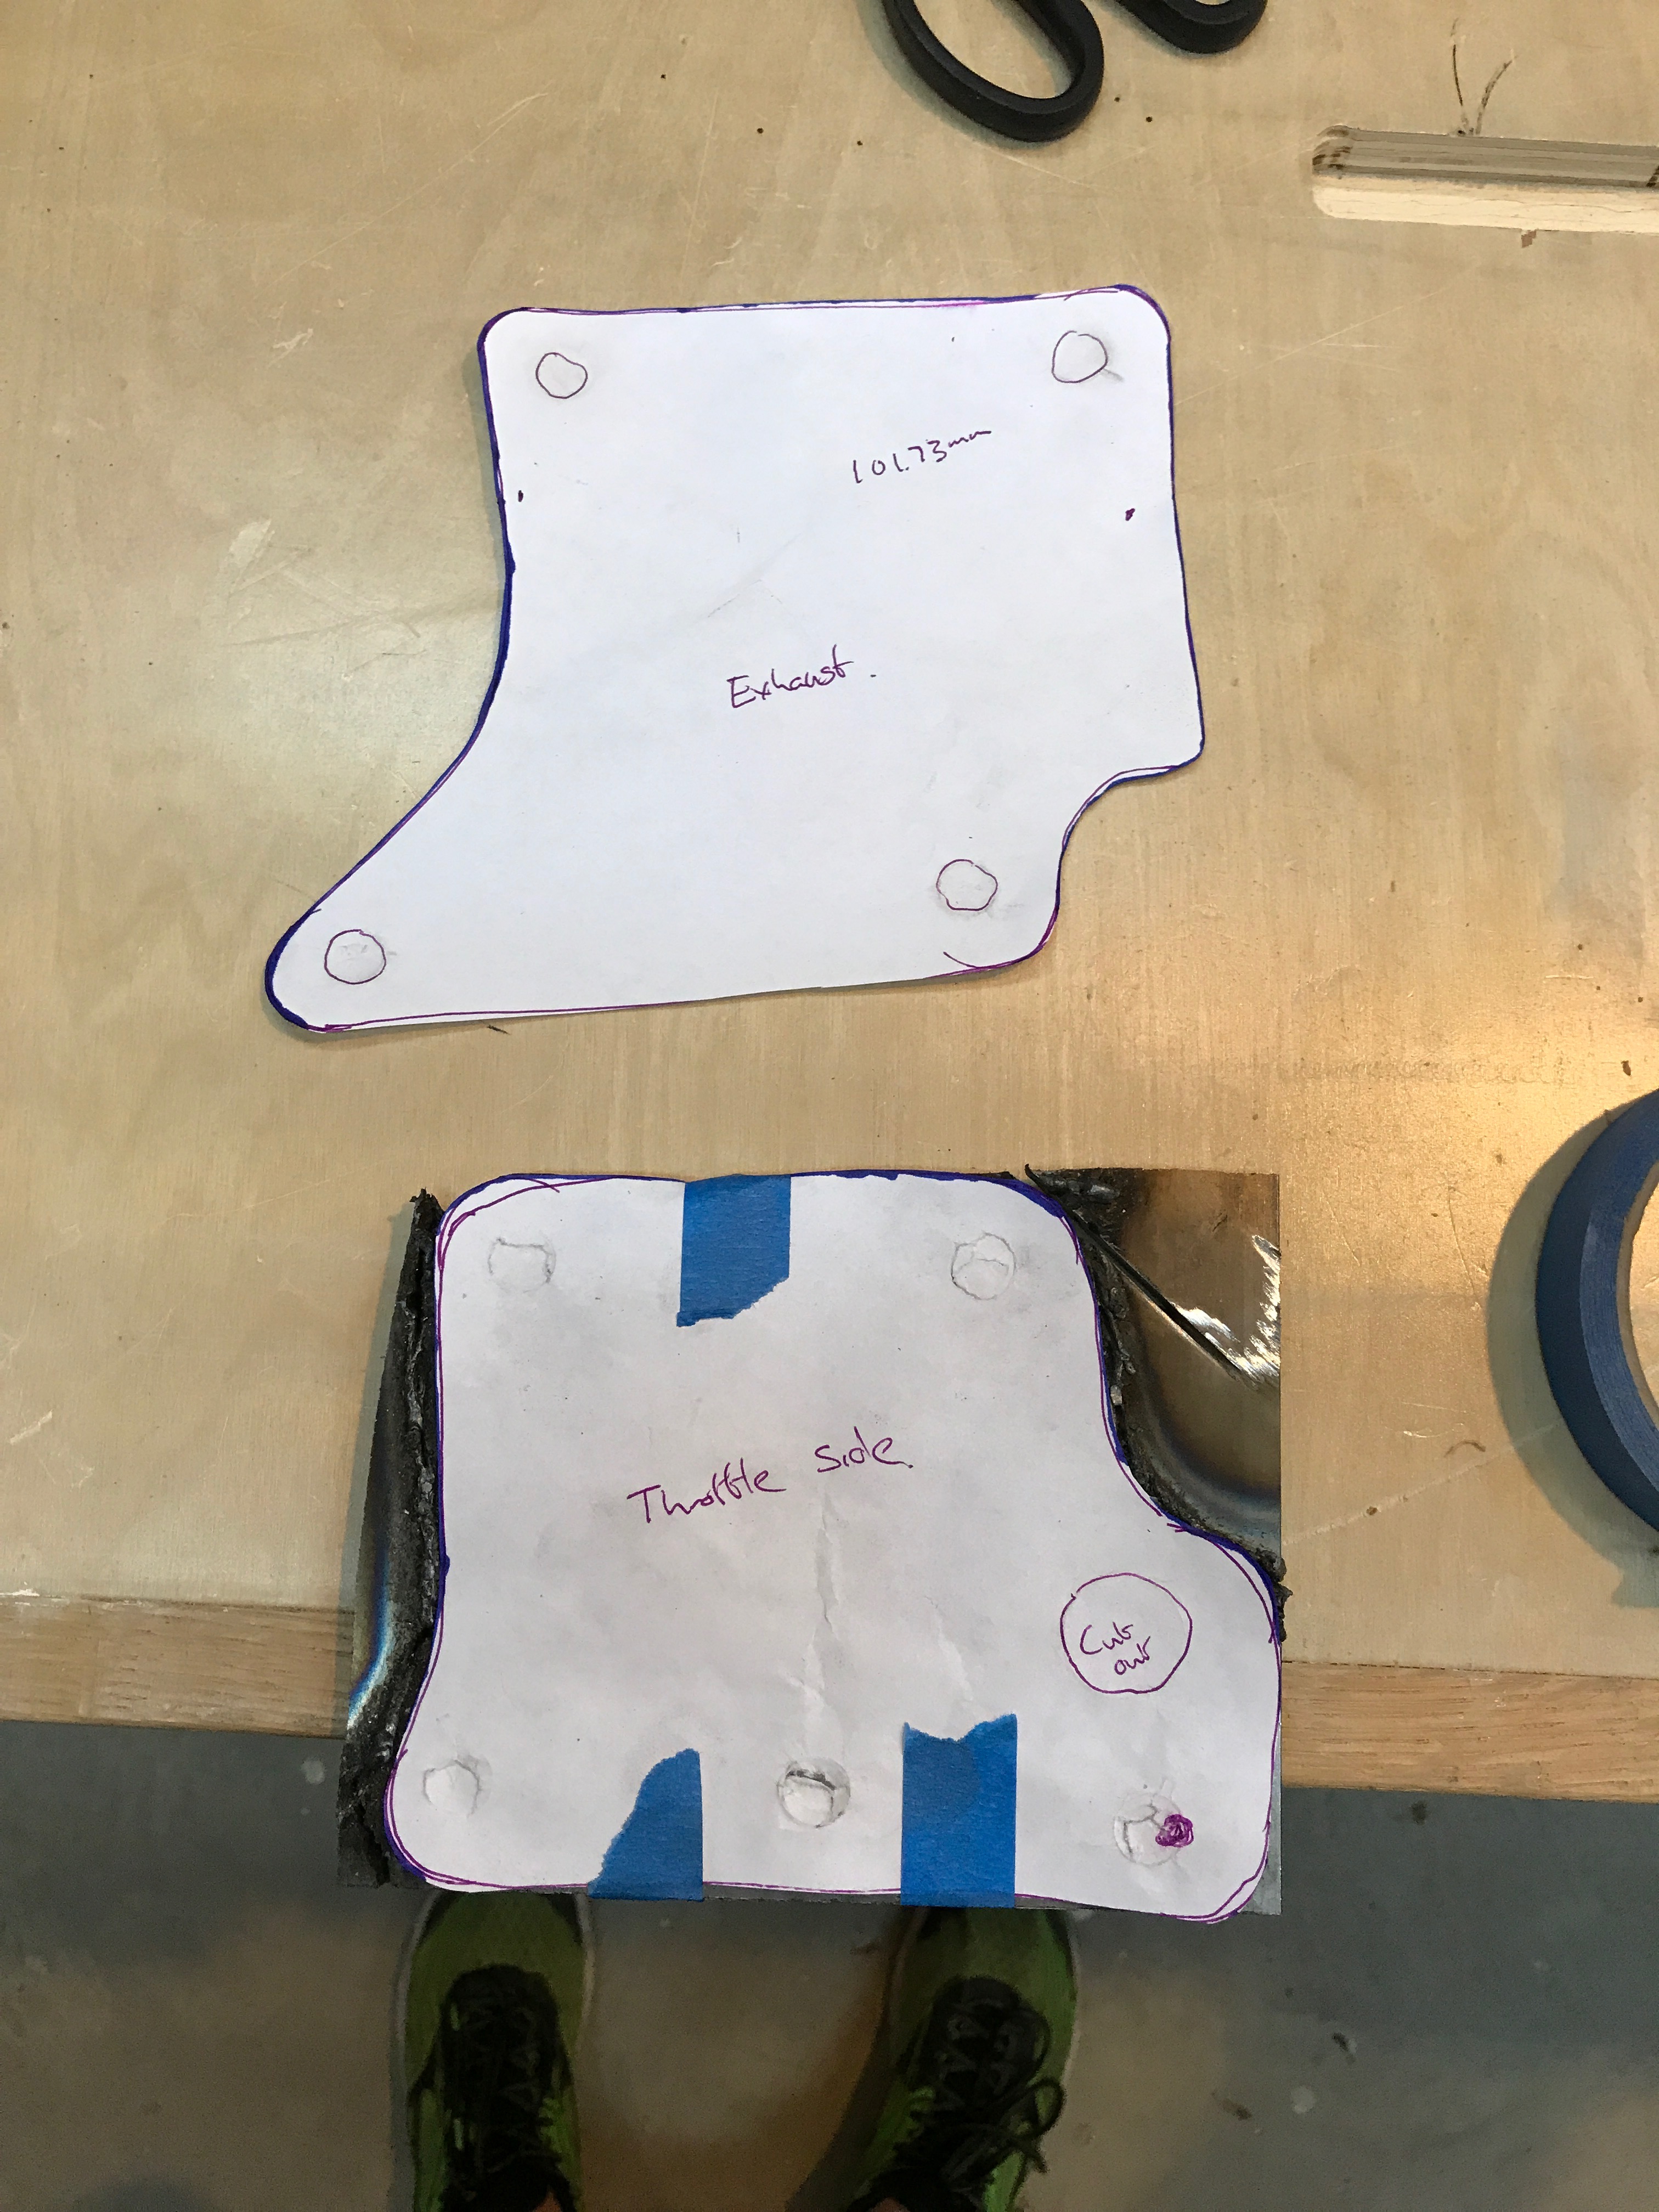
I tried to mount the paper version on a piece of steel and trace it out. My goal was then to cut it out with the plasma cutter. Unfortunately 25 amps was not enough and the breaker would trip at that point. A 4.5″ angle grinder did a good job and soon after I bought a bunch of flap disks with the intent of getting them to being really smooth and pretty. Next up I need to measure and cut spacers as the plates will not bolt flush to the engine block.
More to come..
 The hardest to find parts is anything related to the manual transmission. It’s really like looking for a needle in a haystack.
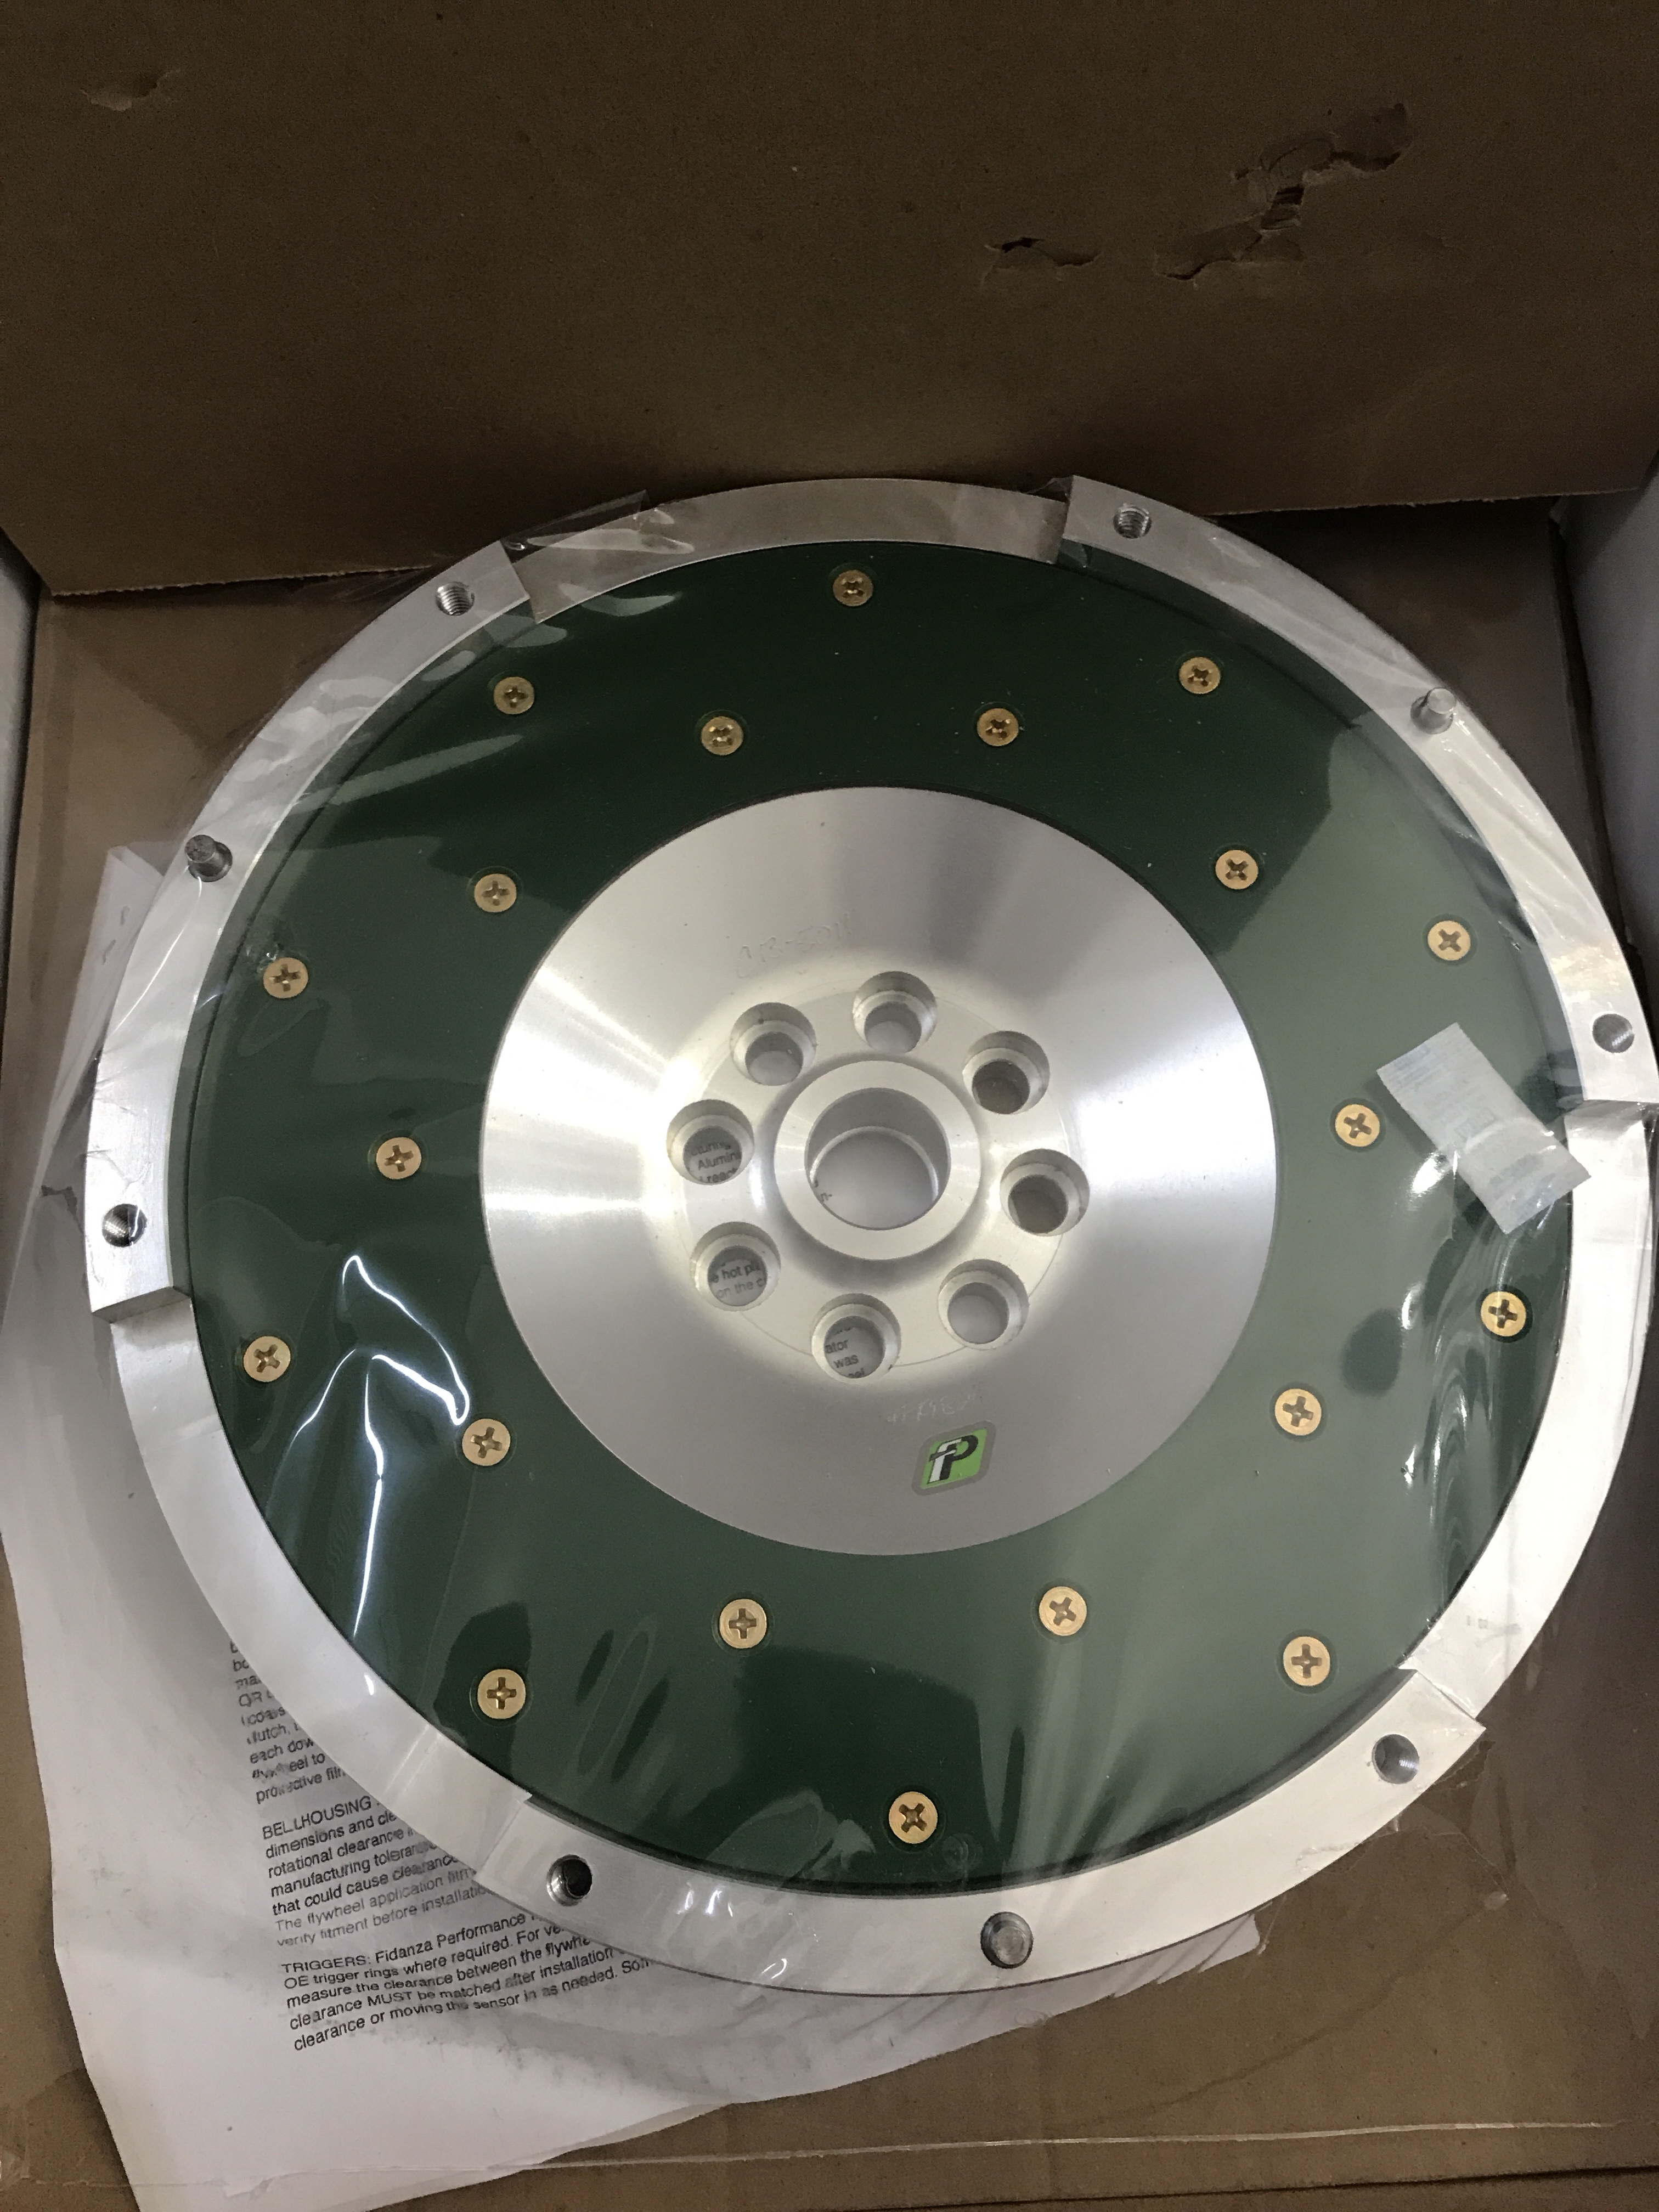
I bought a fidanza flywheel after refusing to pay $800+ for a factory flywheel. My entire life I have wanted a lightened flywheel so it was an attractive option.
The problems..
Firstly the flywheel bolts are custom. Thankfully Tim at Zzperformance hooked me up. I will admit that looking for M11 bolts was a pain in the ass!
Secondly the pilot bearing is a big question mark. It doesn’t look like the factory would fit and there isn’t much information about what to do. More to come on that front after I talk to Fidanza.
Lastly I have called a few dealers trying to find a factory clutch and pressure plate. Many of them don’t see it in the parts catalog which is frustrating. I will most likely just buy it from Zzperformance.
If you decide to go LTG I would recommend just buying the clutch masters at from zz and be done. Spending hours trying to find information for simple things is not worth the savings!
After a large amount of research I was frustrated by the poor development of the LTG motor by General Motors. The initial launch was so strong but the follow through of the crate engine was very poor.
My hope is that I can add some content for anyone with an Ecotec build that isn’t willing to pay $8k for a crate motor, $4k for a manual trans, $2k for an ECU and a good few other packages to get things going.
I managed to talk to Andy at Swap Specialties and he gave me a good amount of faith in the process and their development.The order at the end of the day was for an almost fully loaded harness. – http://swapspecialties.com/product/gm-echo-tec-standalone-harness/
One aspect that Andy mentioned was their ECU and harness doesn’t require the fancy PWM fuel pump controller and a dead head pump. This is ideal because I have a fuel cell and would not want to modify the filler mechanism.
Lead time is 4 weeks but there is plenty to do and buy before I need the harness!
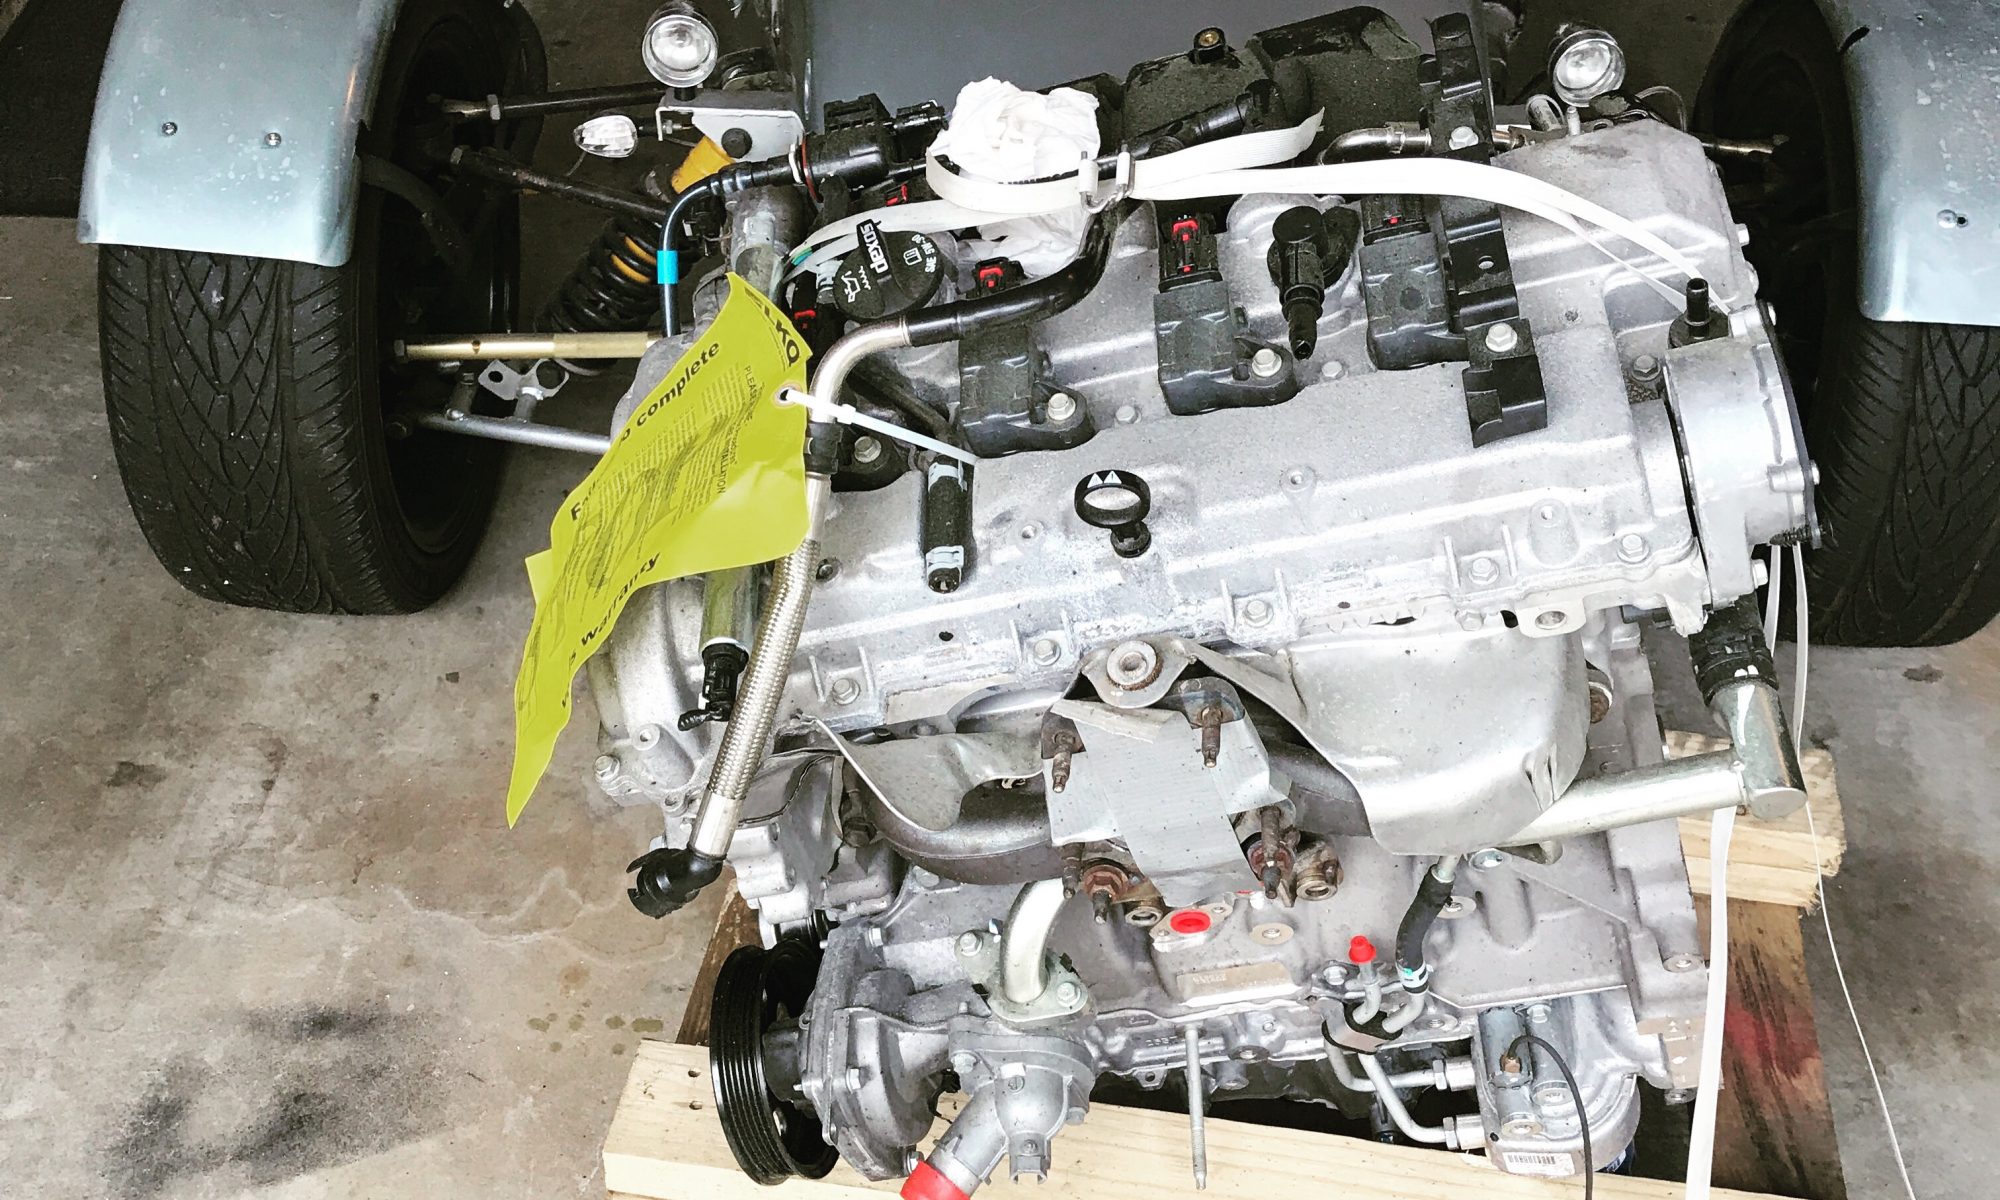
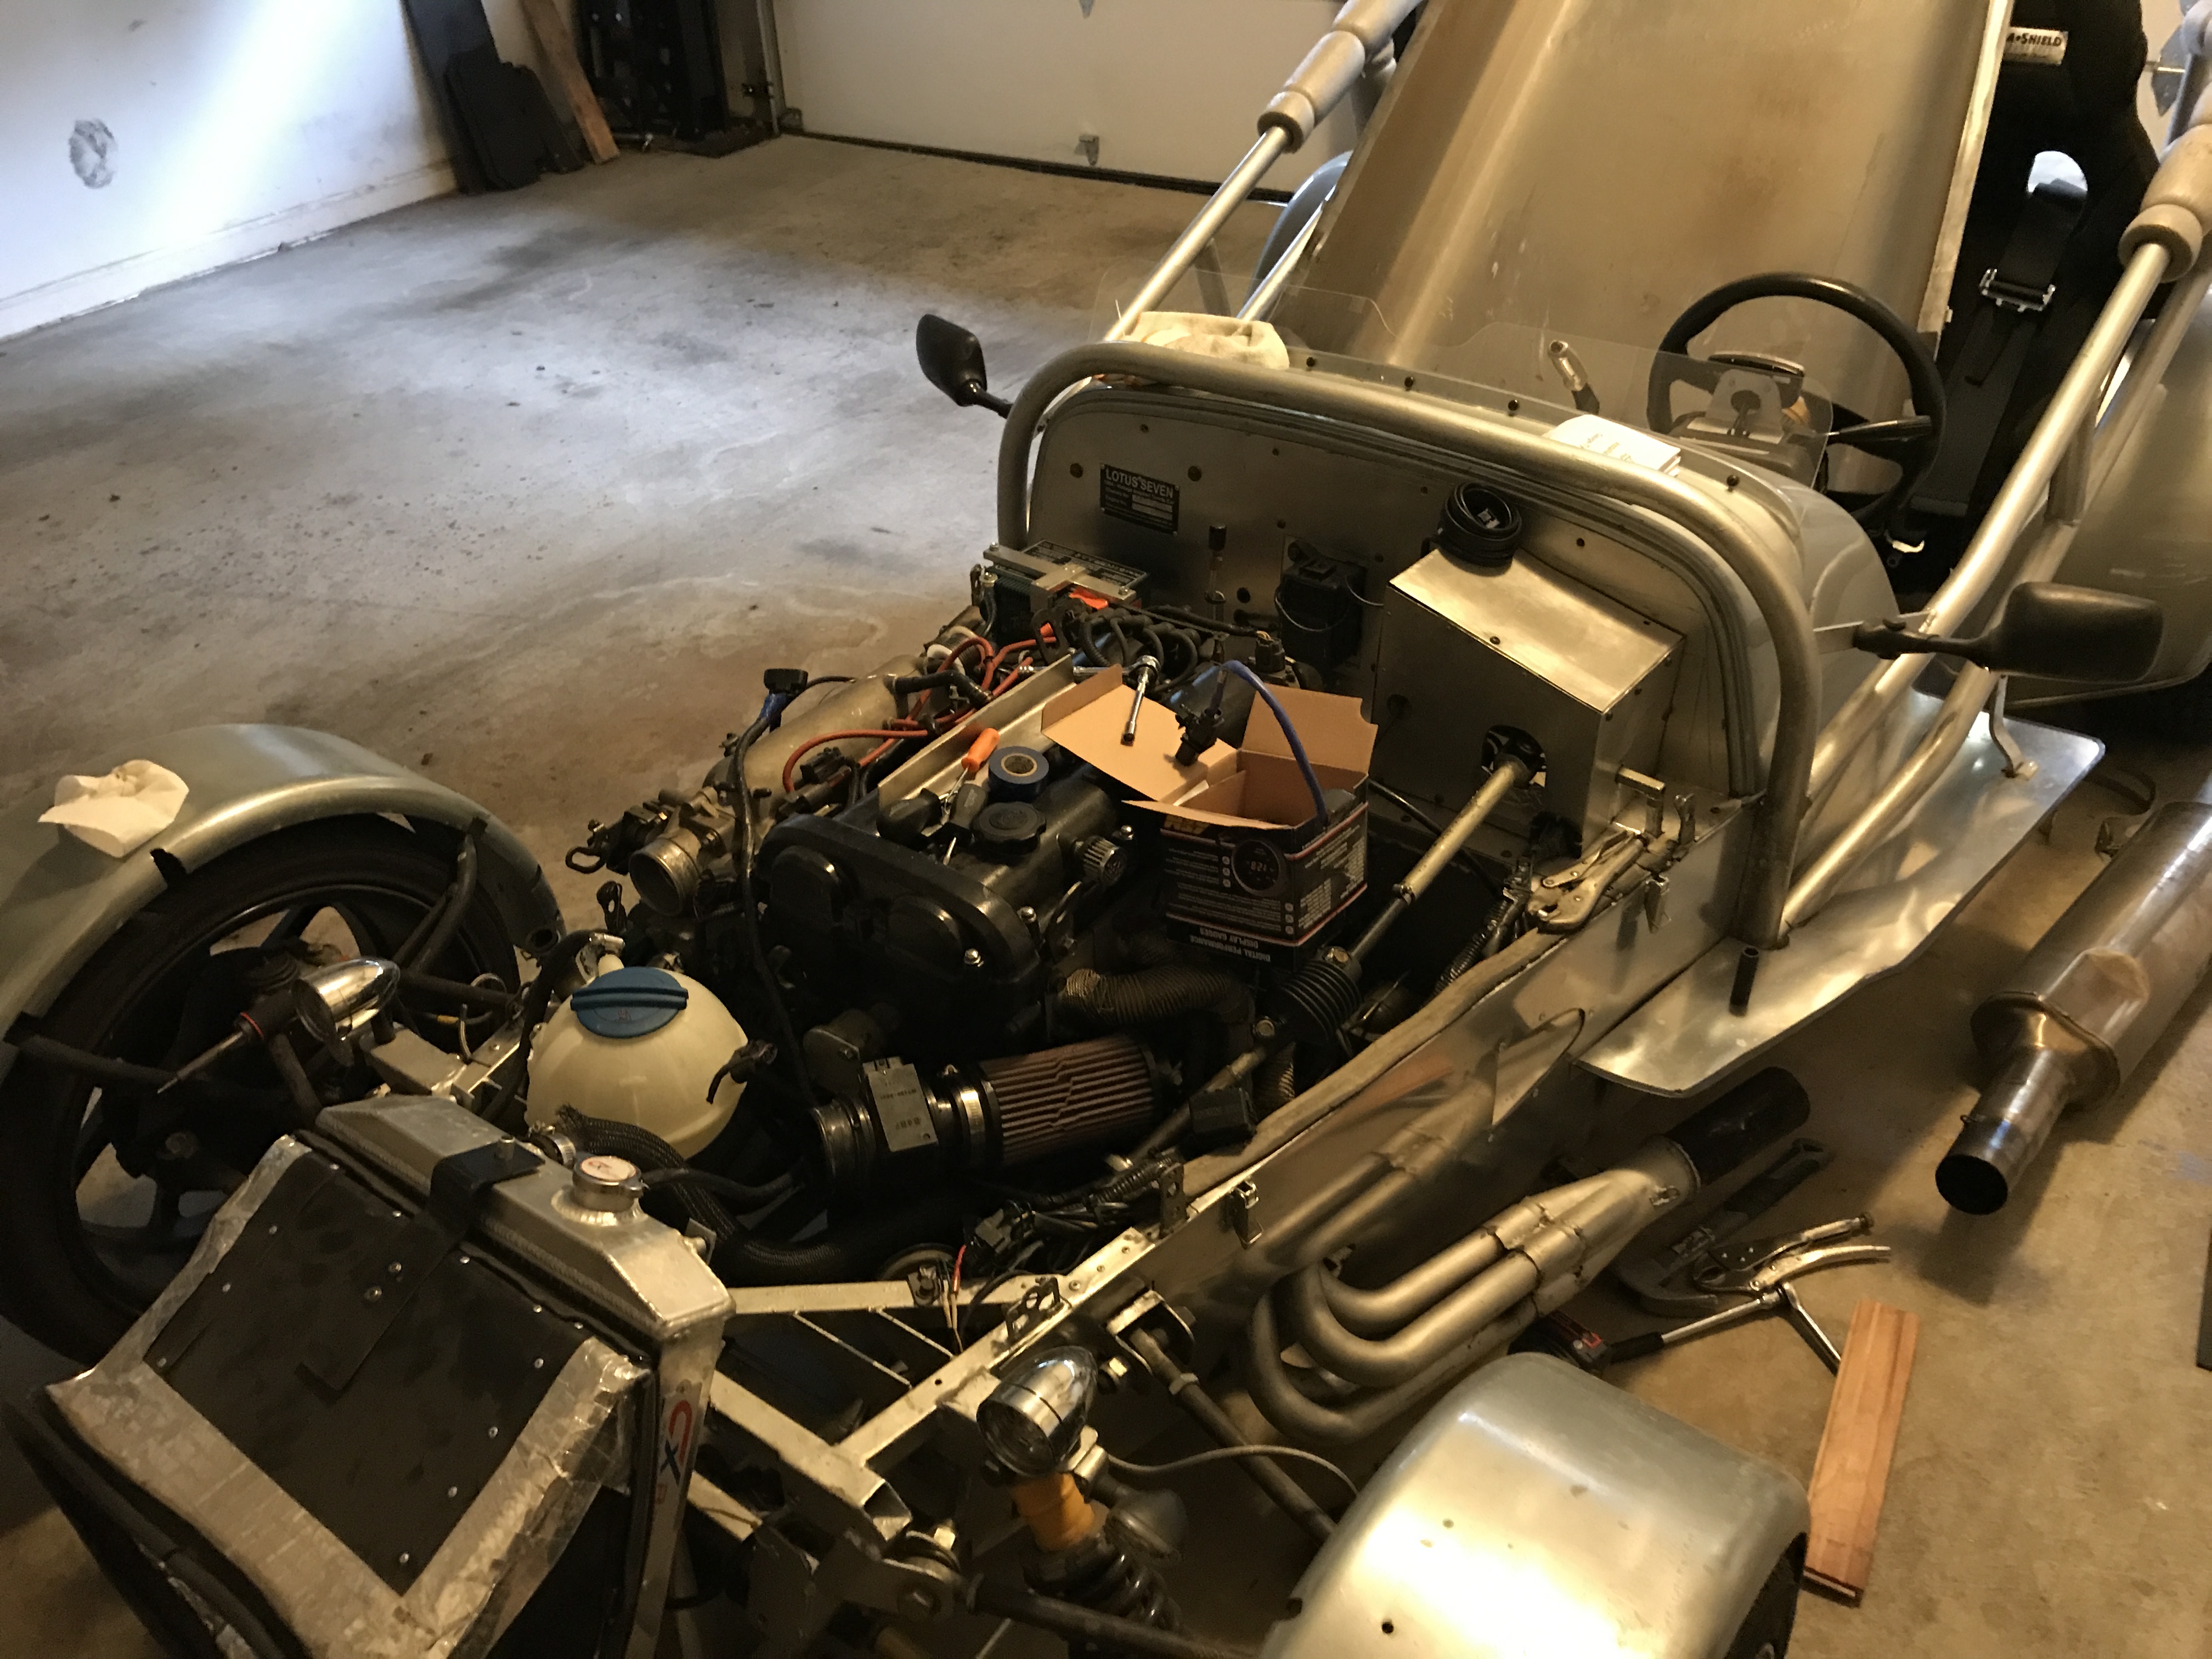
After thinking and looking around I decided it was time to pull the Miata engine out and go with something new.
Enters the Gm LTG ecotec engine! Modern power for the classic car!
For the first 5-10 miles the car was “fast enough” but quickly it I adapted and wanted more power.
 Note the 3 core radiator, ducting and new coolant overflow tank,
I bought several turbo chargers with the intention of matching one to the car. The consideration was not only size for power but also footprint for fitting under the hood. One problem I have had was an incredible amount of heat that builds up in the transmission tunnel and in the foot box.
Additionally I bought a 2004 Miata engine with VVTI and intended to have it bored and built for power.
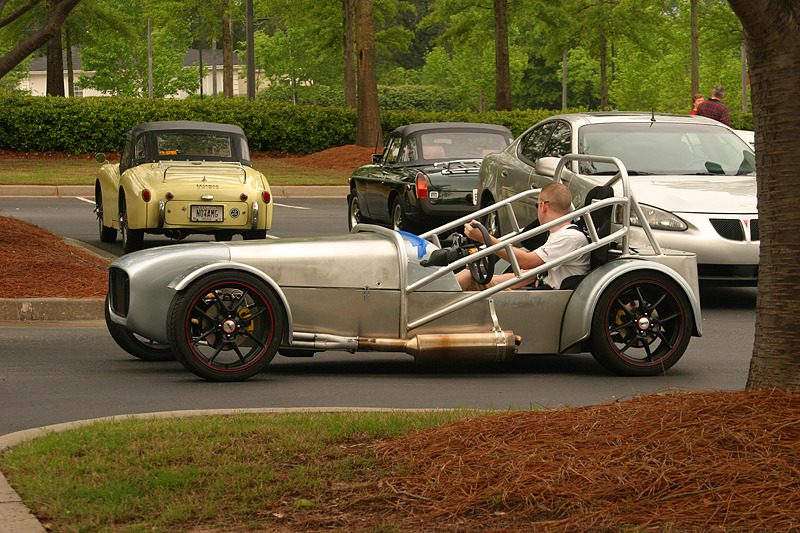
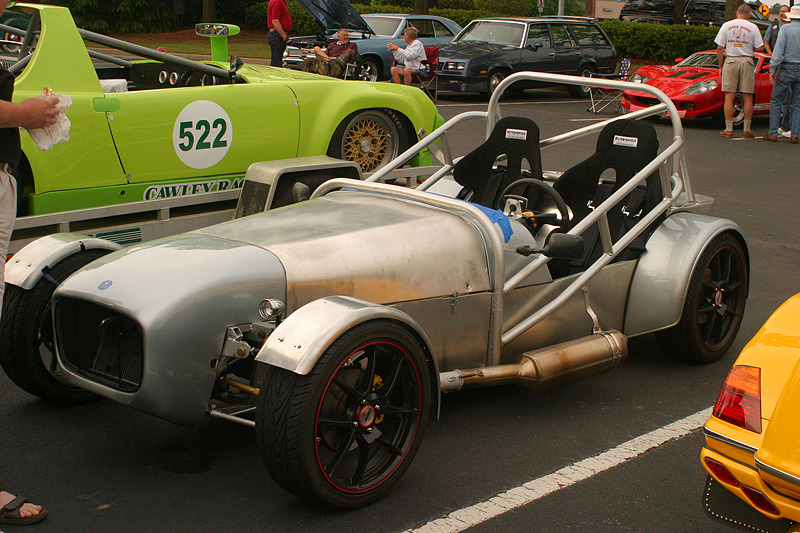
First time i took the car out to a show was Caffeine and Octane. These are some of the pictures I found on facebook where others had taken pictures of the car.
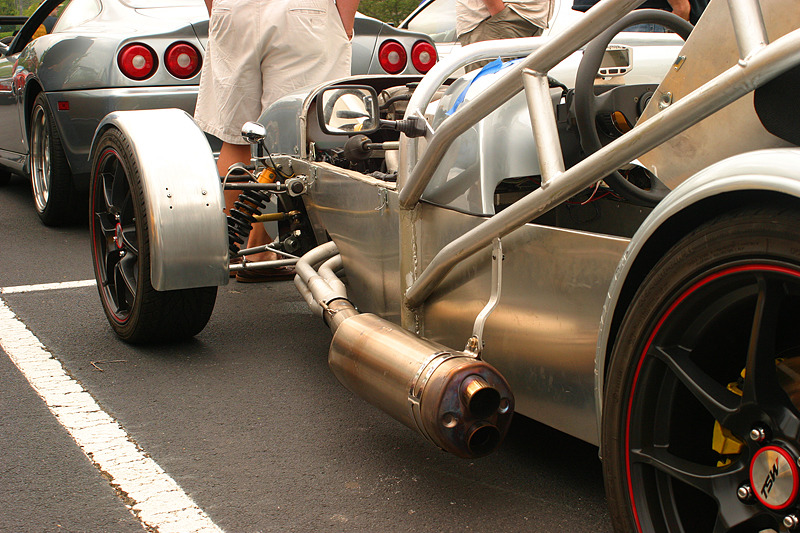 The exhaust is from an Aprilia Bike. It has a factory cat convertor and flows very well. The sound is pleasant as well
 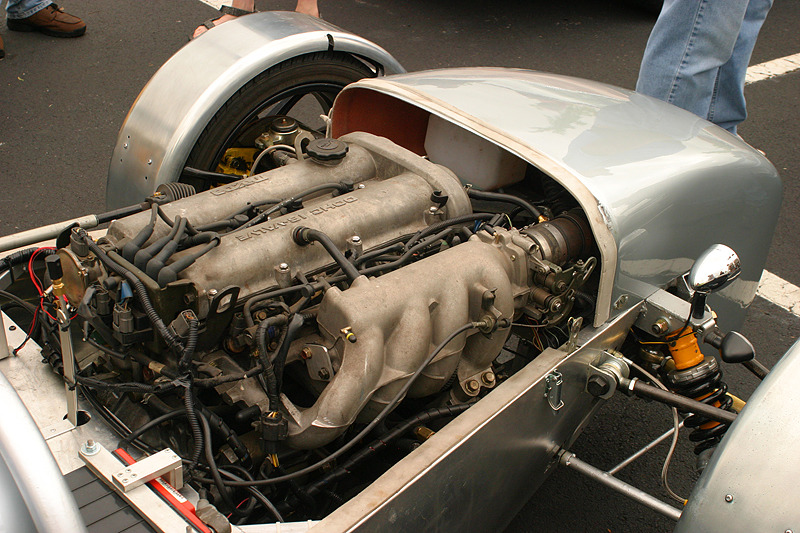 The original battery didn’t last long- thankfully in this day and age LIPO batteries are amazing and half the weight. The coolant overflow tank did not last very long as the vibration tore it apart.
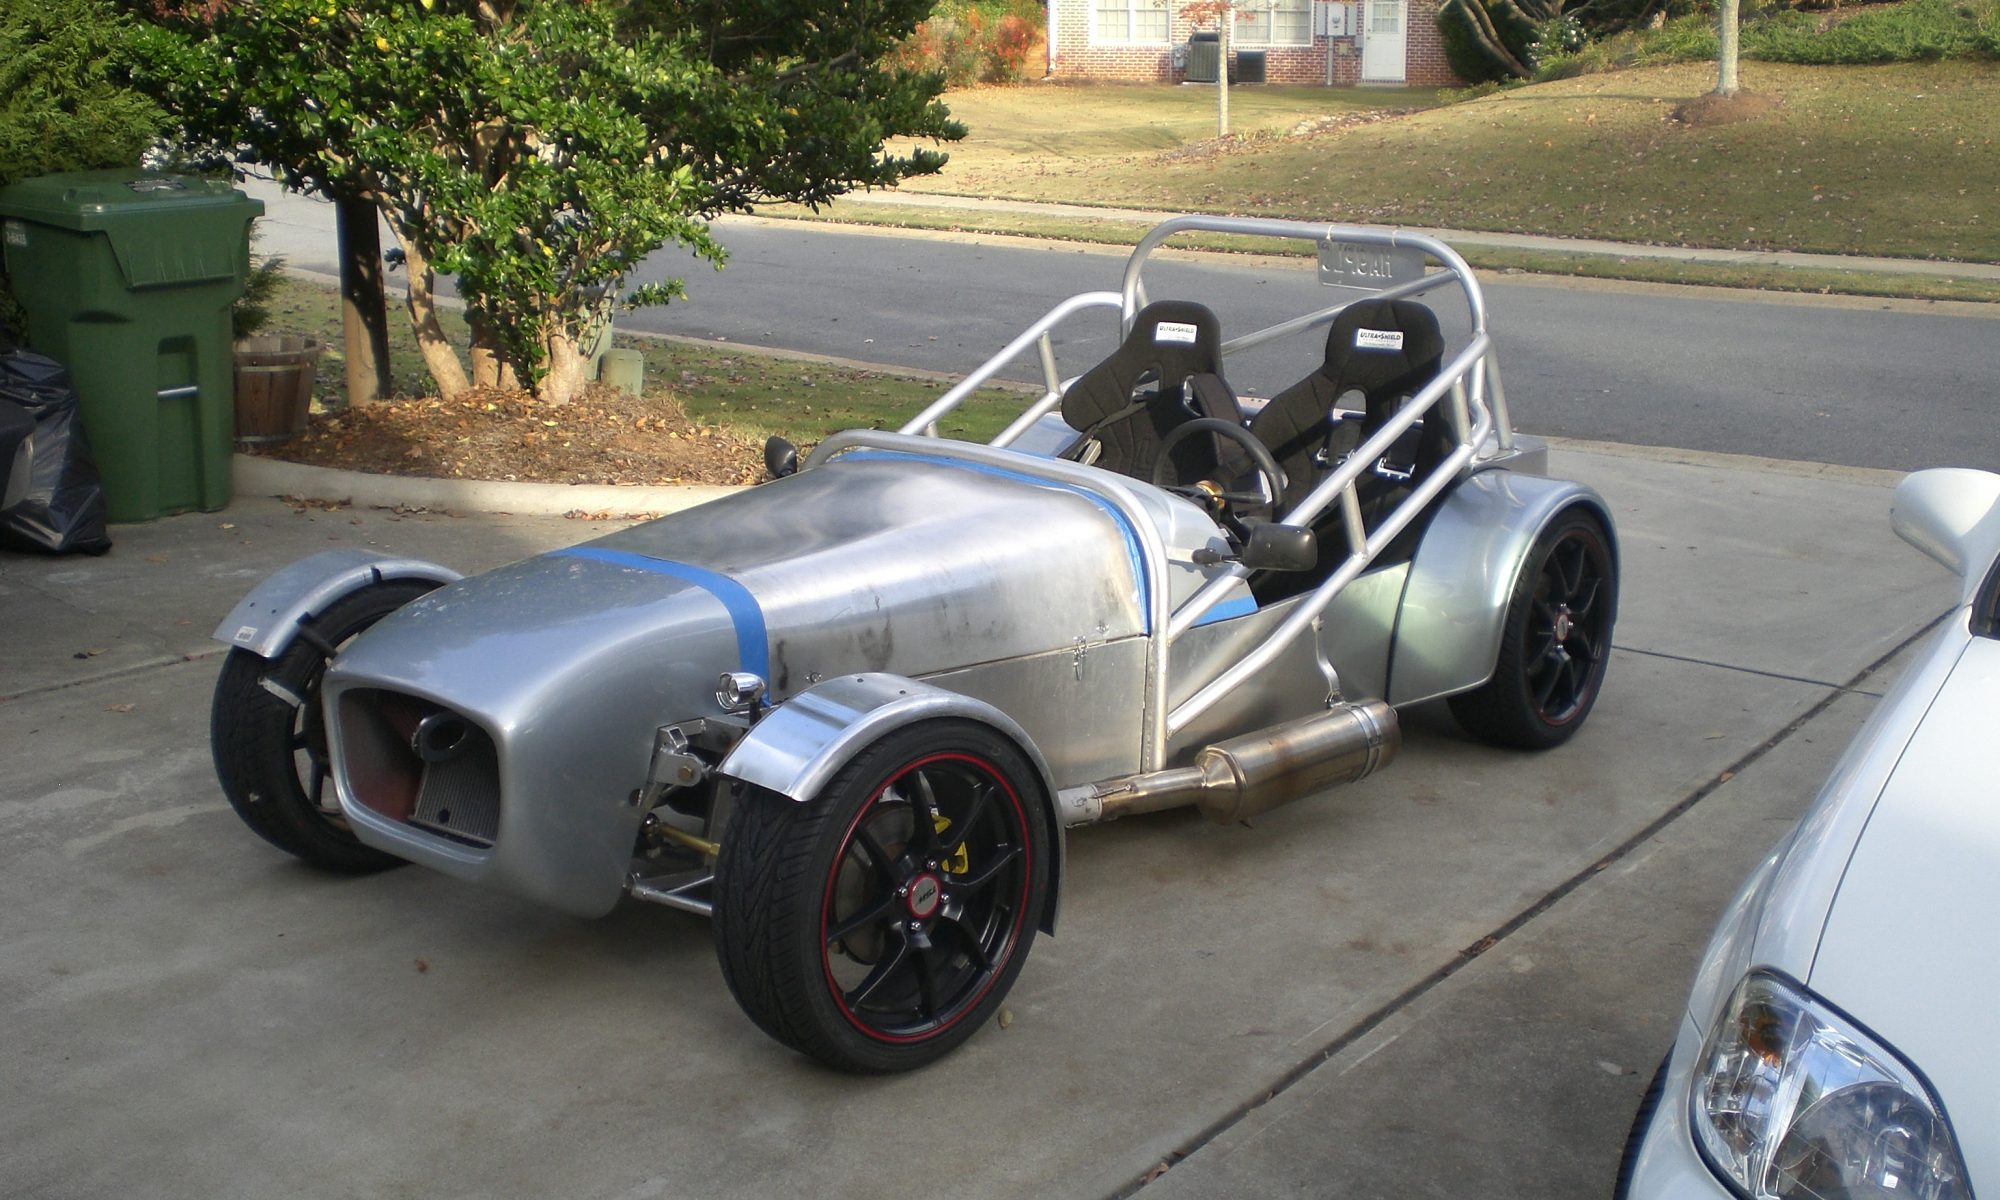
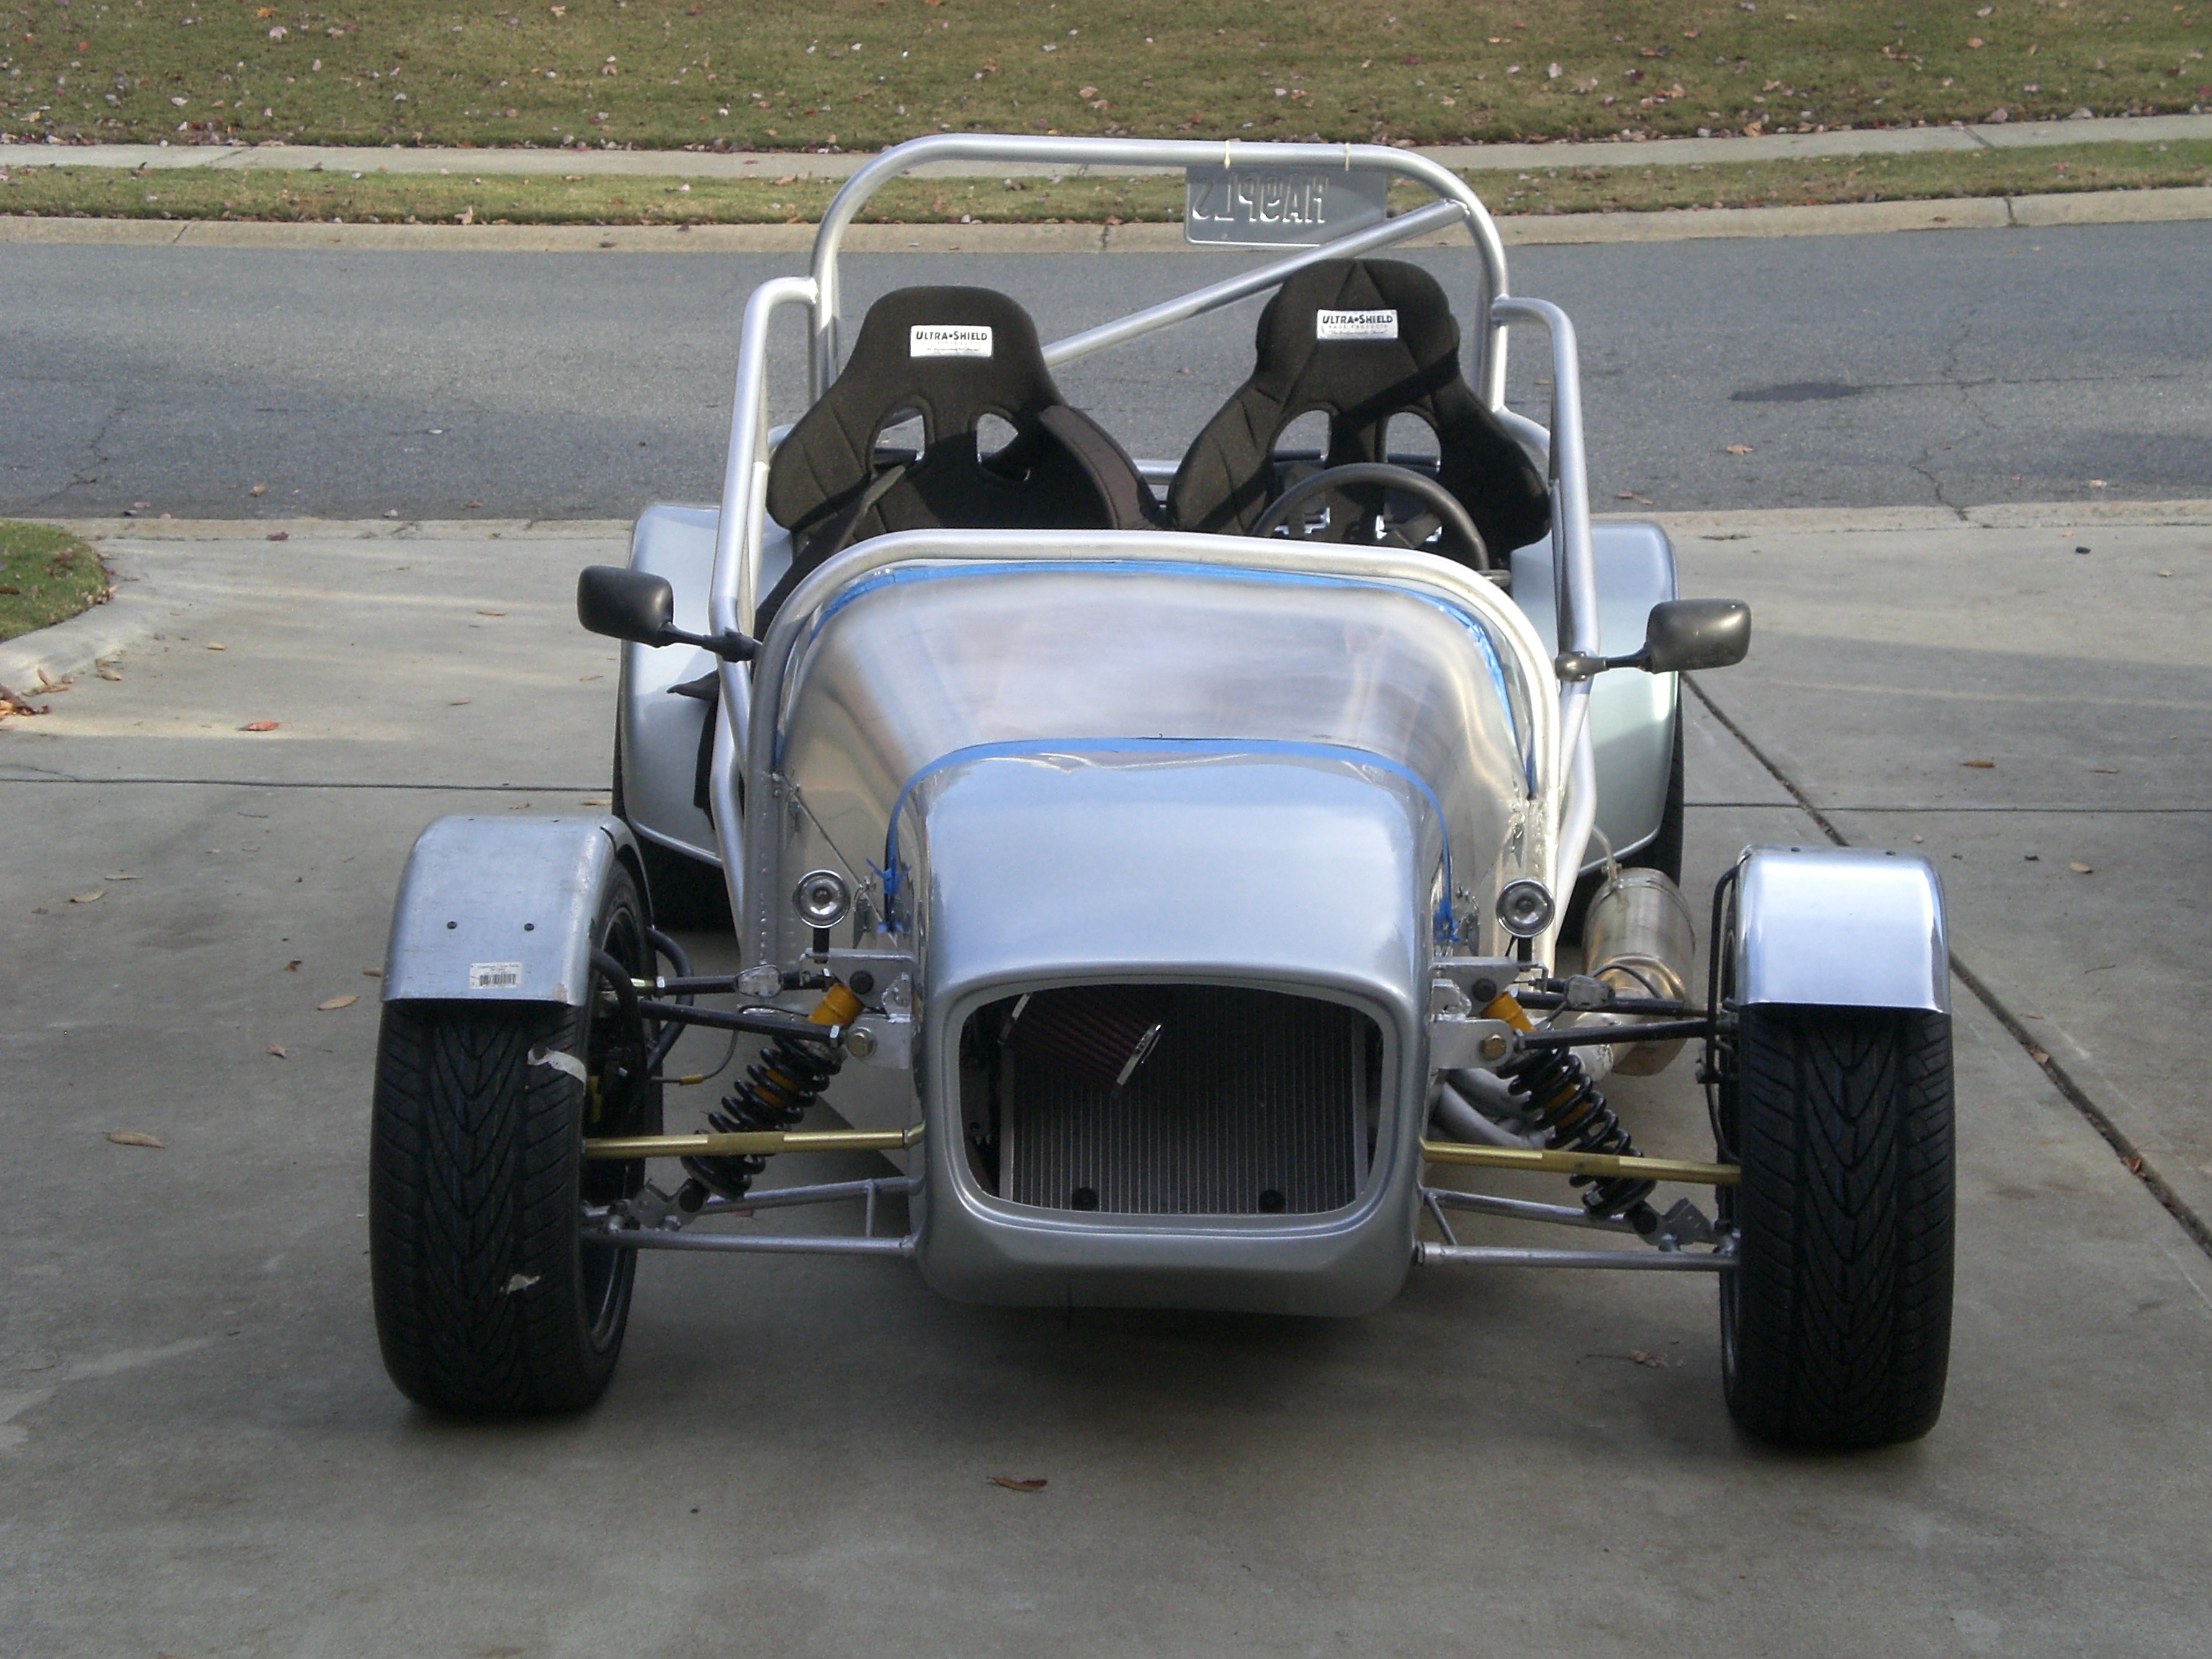
These are some of the pictures when I got a tag and took the car for a drive. The blue tape is on the car while fine tuning some of the body fitment pieces.
I don’t love the black wheels. They looked great online and I was able to get some help from a friend to get a killer deal. The requirement was a 17″ wheel to clear the front upper ball joint.
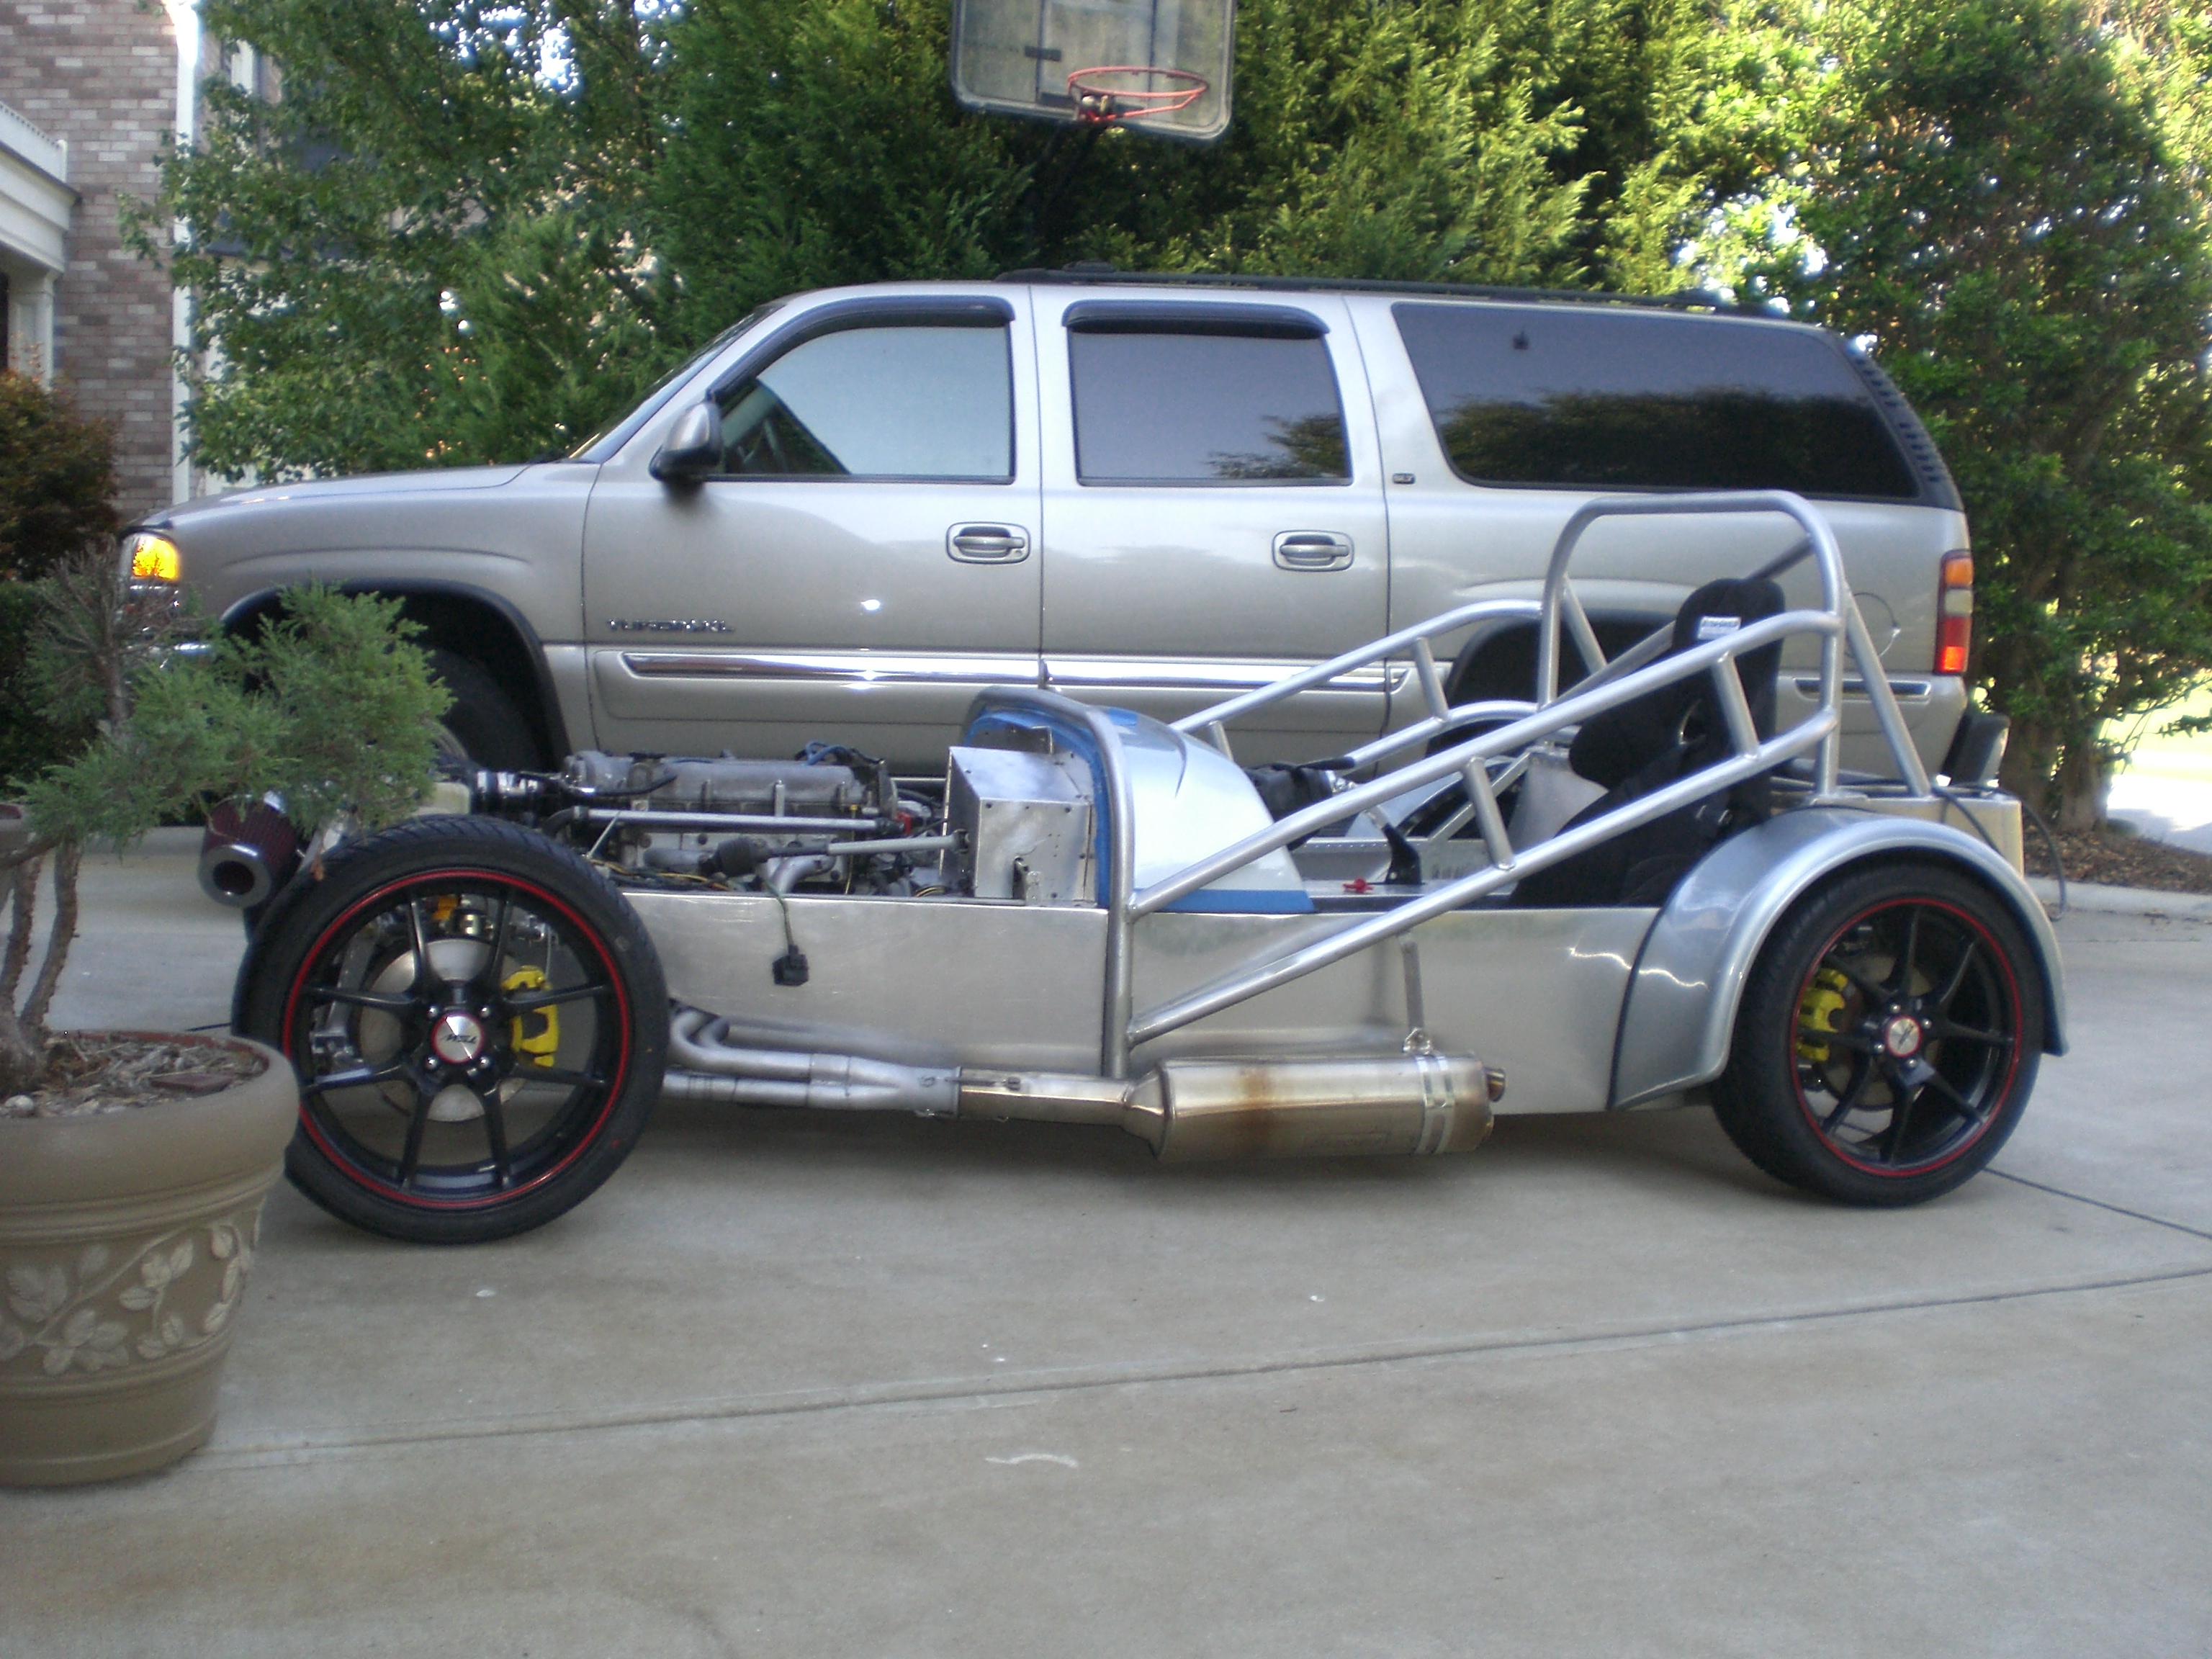
The brakes look tiny but they are more than enough to do the job. For size comparison the top of the roll cage is about 12″ taller than the top of the fender on the Suburban.
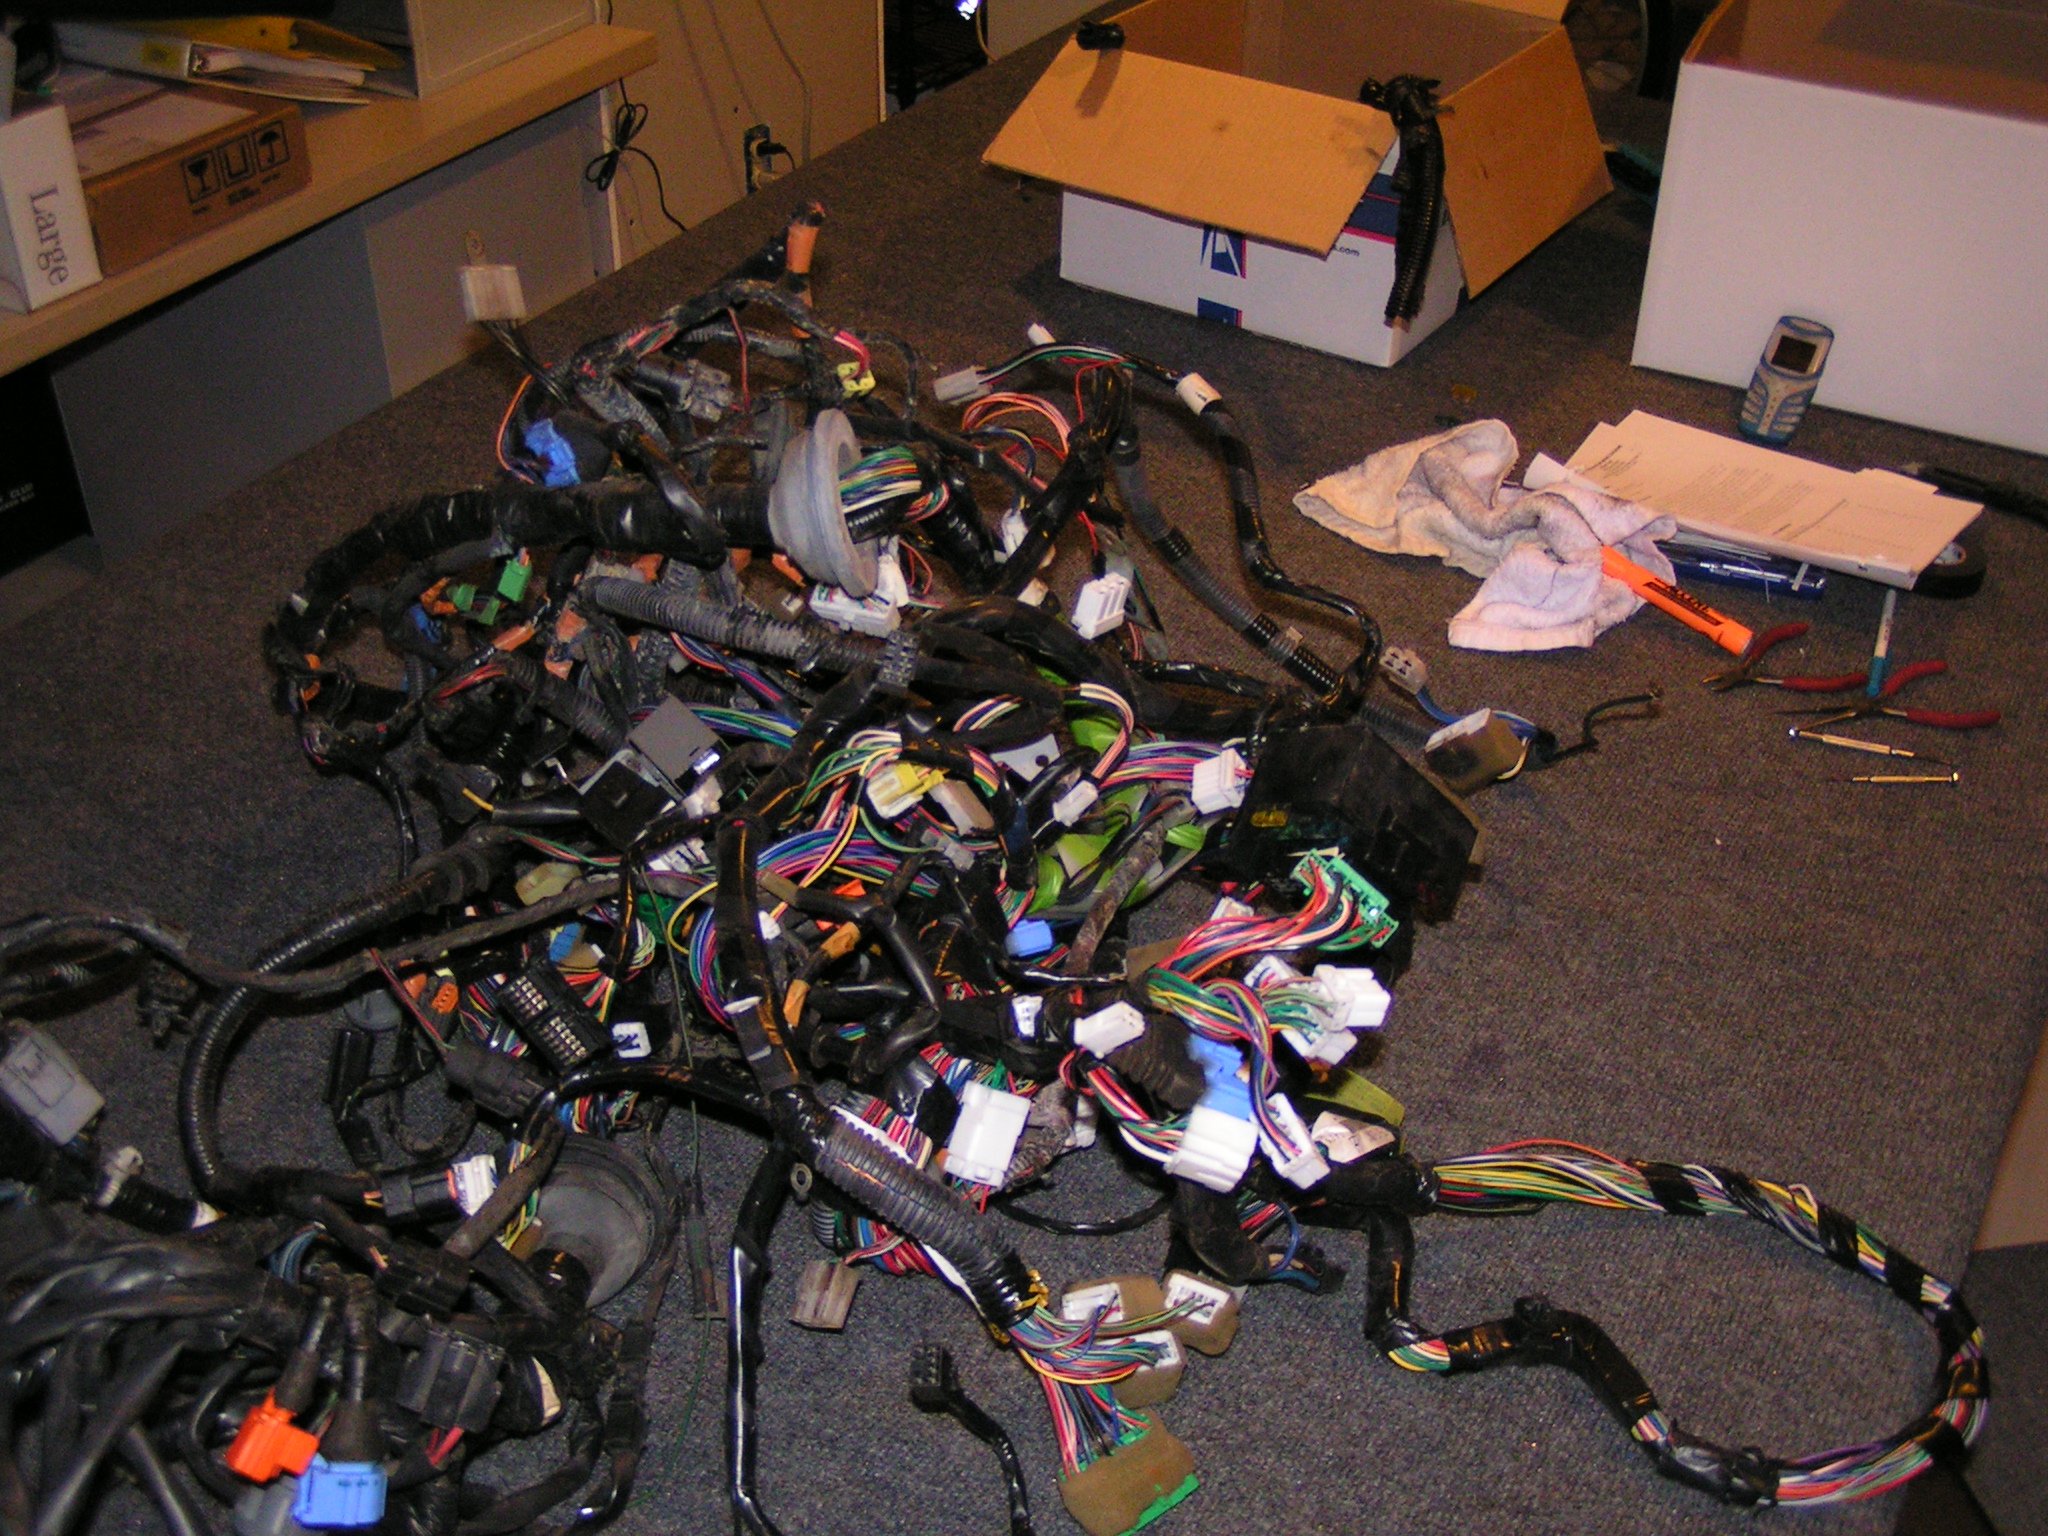
When I started I had collected the entire Miata wiring harness and related plugs/modules. First I removed all of the wire wrap and used a gallon or 2 of degreaser to get the years of adhesive off. Using several wiring diagrams I managed to identify and remove over 35lbs of wire and sensors that I didn’t need anymore. Things like power windows, wipers,emissions crap etc all hit the scrap pile.
Admittedly I was afraid because I didn’t know exactly what the engine and ECU would need to run. I left a few extra wires and plugs when I was unsure.
For the taillights I did not want to use anytime similar the original or Caterham- both of those solutions use RV taillights. After looking around I managed to find some LED’s that would light up in multiple colors.
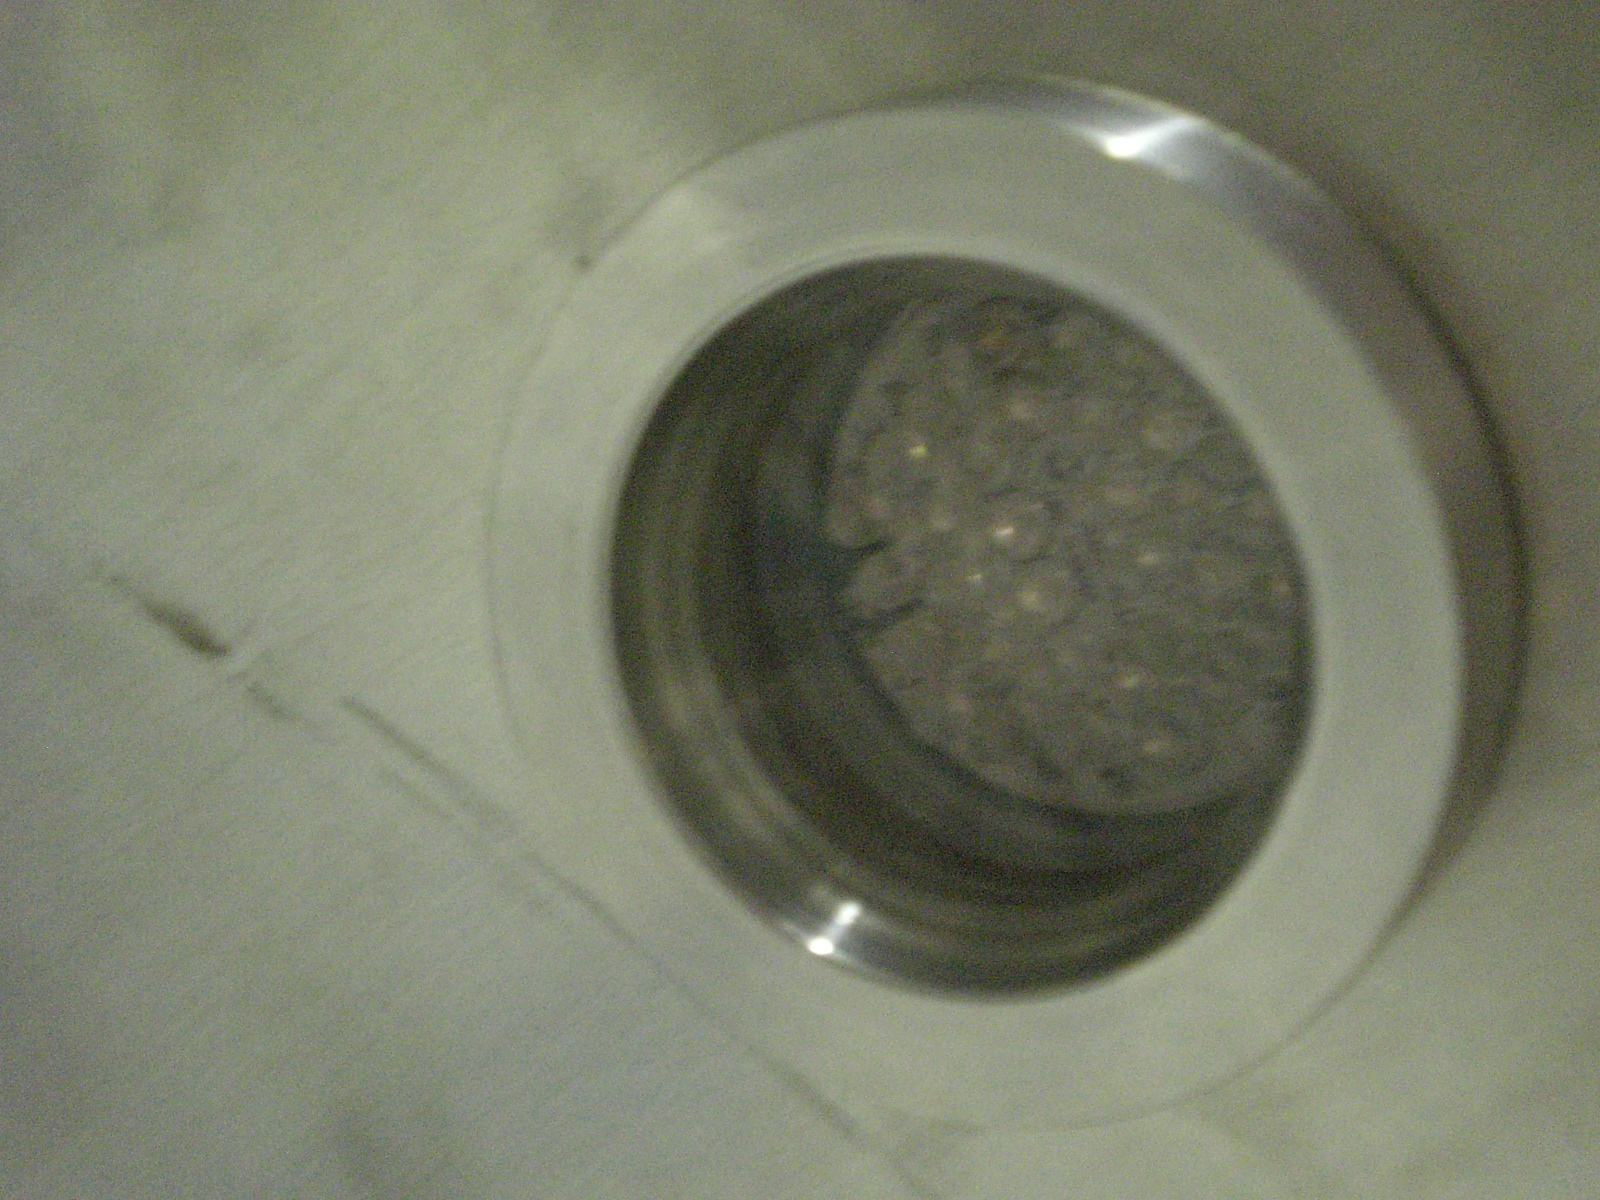
First step was to buy some Aluminum blanks.

From there I turned them down to provide a small lip and allowing for a piece of glass between them. The lights are able to light up Red, Orange or white.
The coolest part is they will hold red but flash orange if a turn signal is lite up. White for reverse lights obviously.
Here is a shot of the turn signal on. I mounted them as high as possible and they are very bright which I hope will help with awareness. 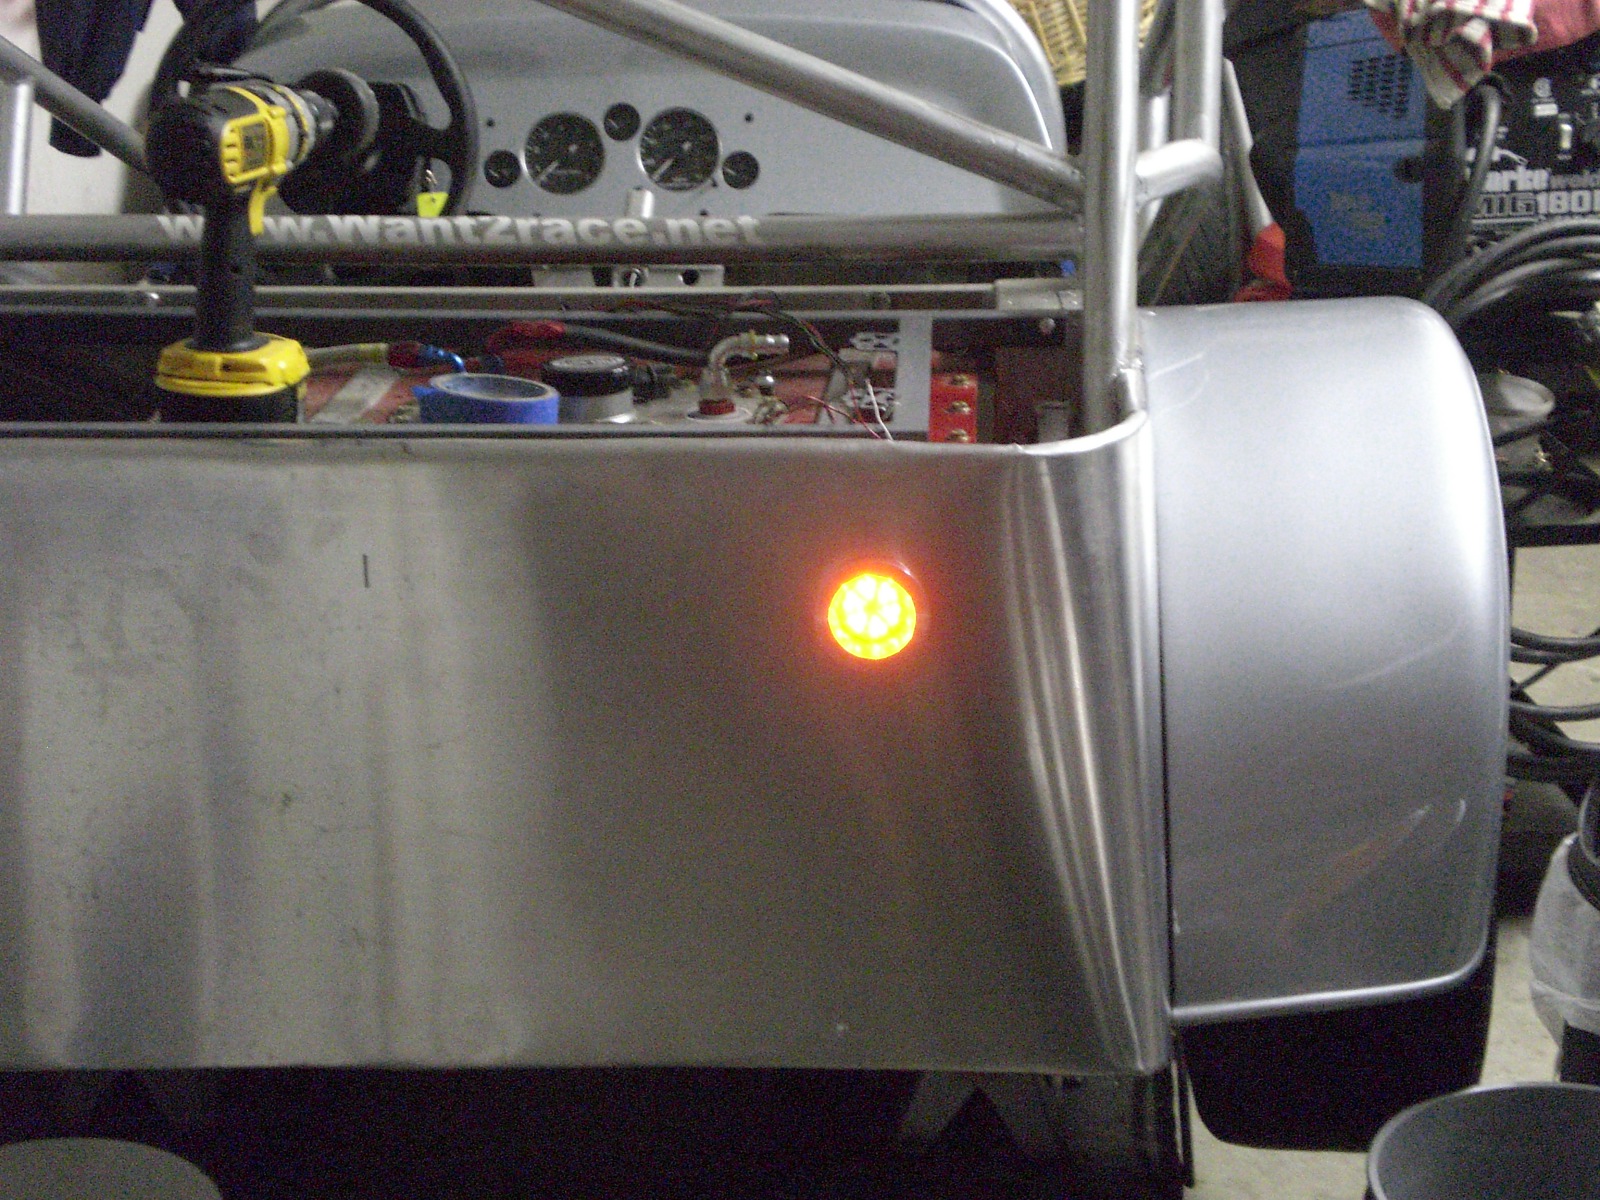